Wallix
Discover step-by-step instructions on configuring a connection with Wallix. Learn how to integrate your application with Wallix to secure and streamlined SSO authentication.
How to start

- Login to your Wallix account.
Create the SSO Application

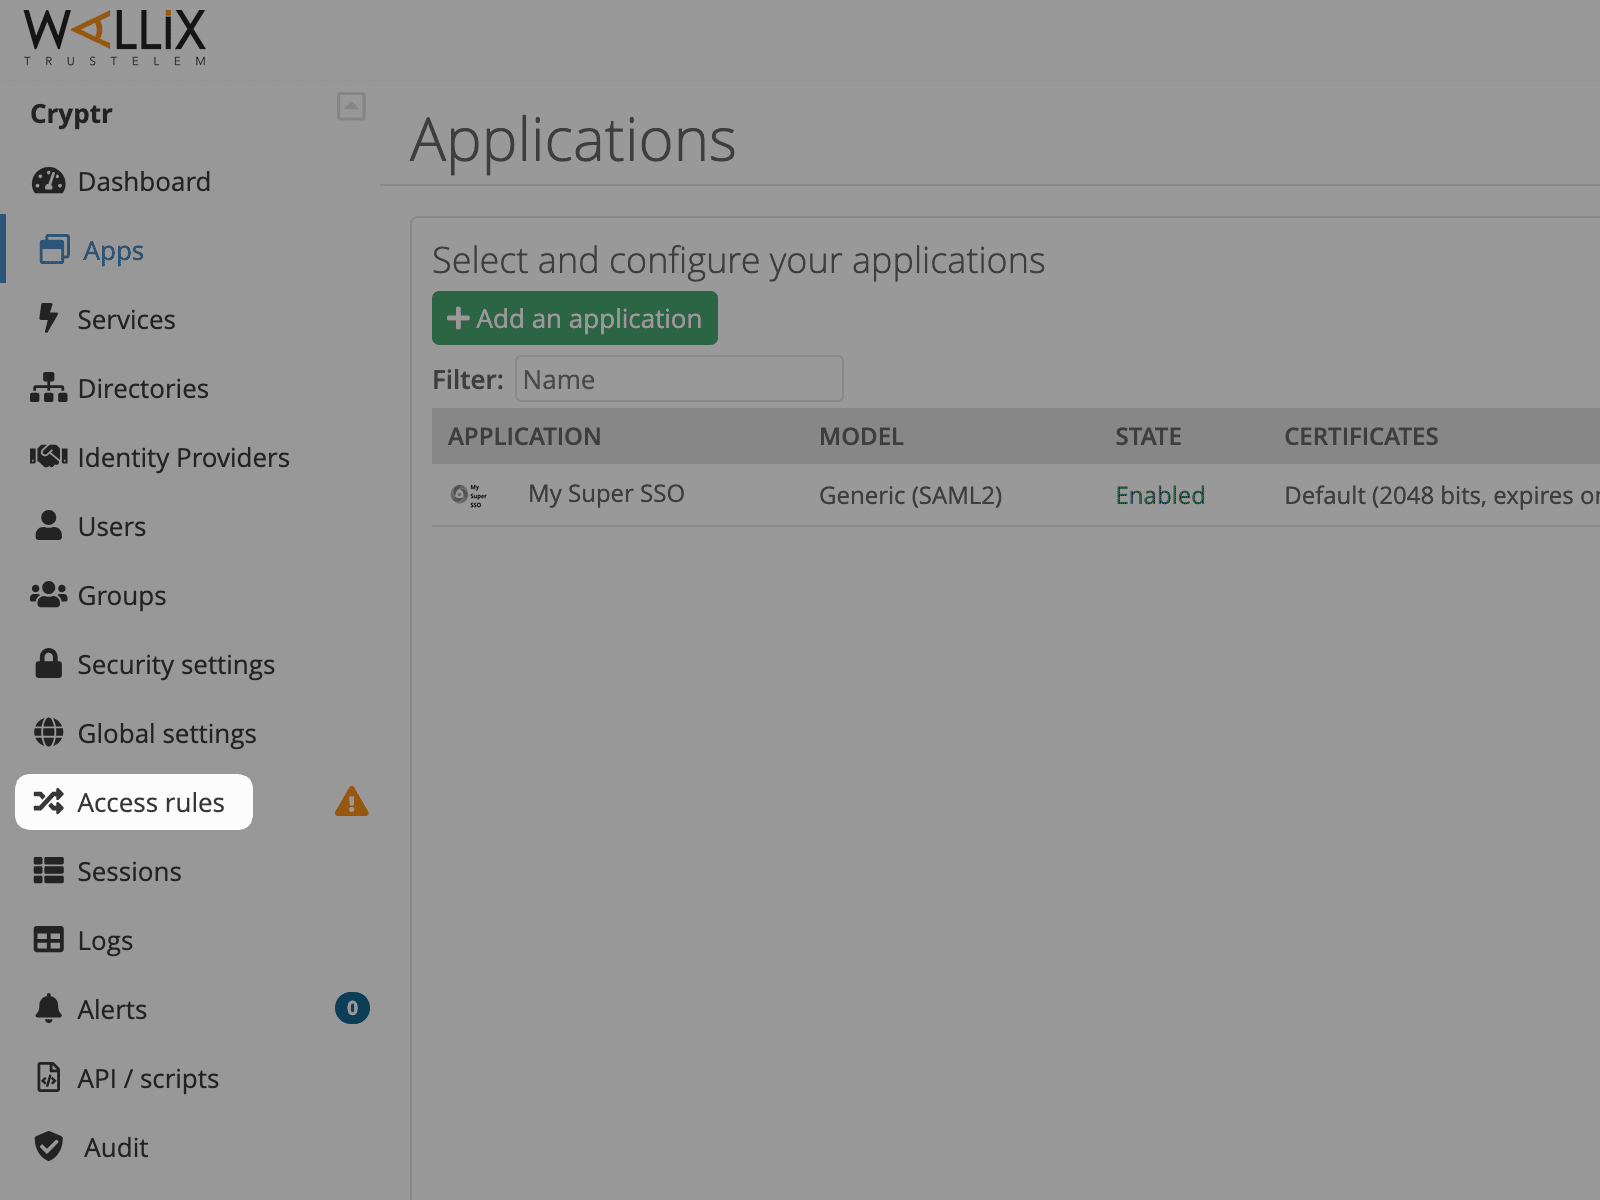
- In the vertical bar on the left side of your dashboard, click on “Apps”.
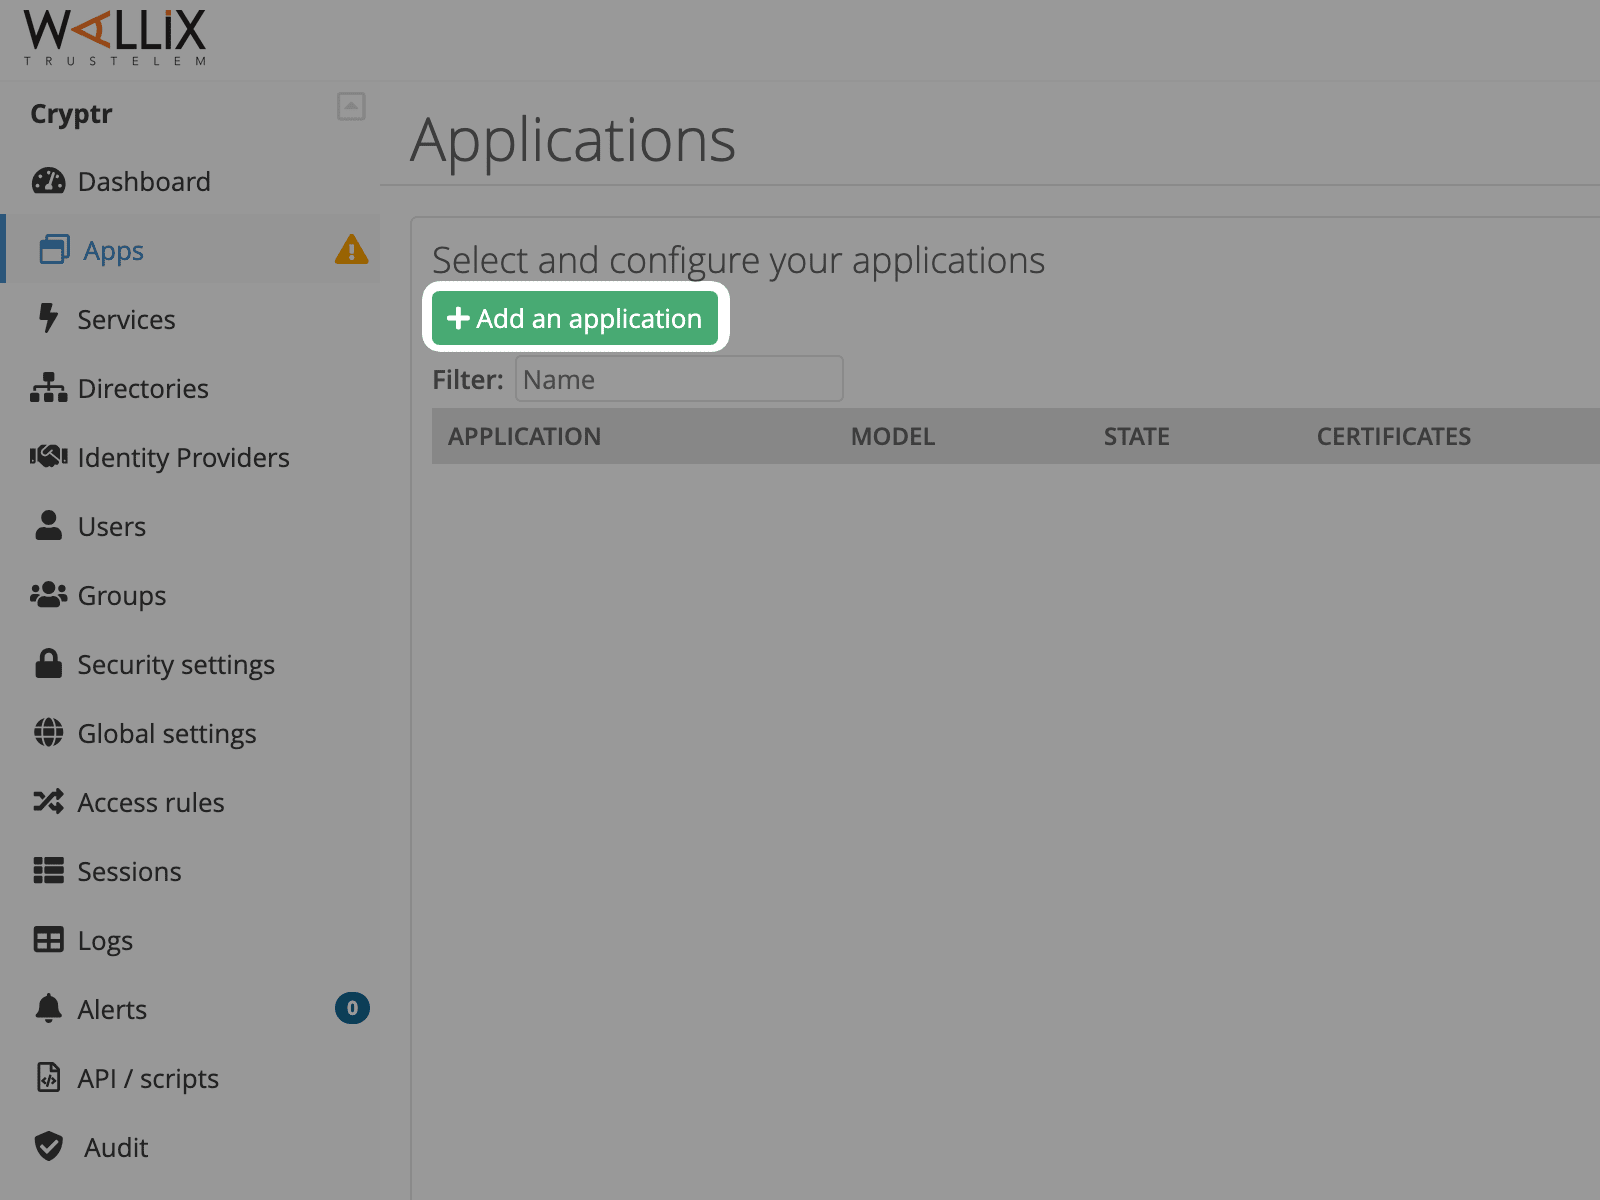
- You should see a list of your applications. Click on “+ Add an application.”
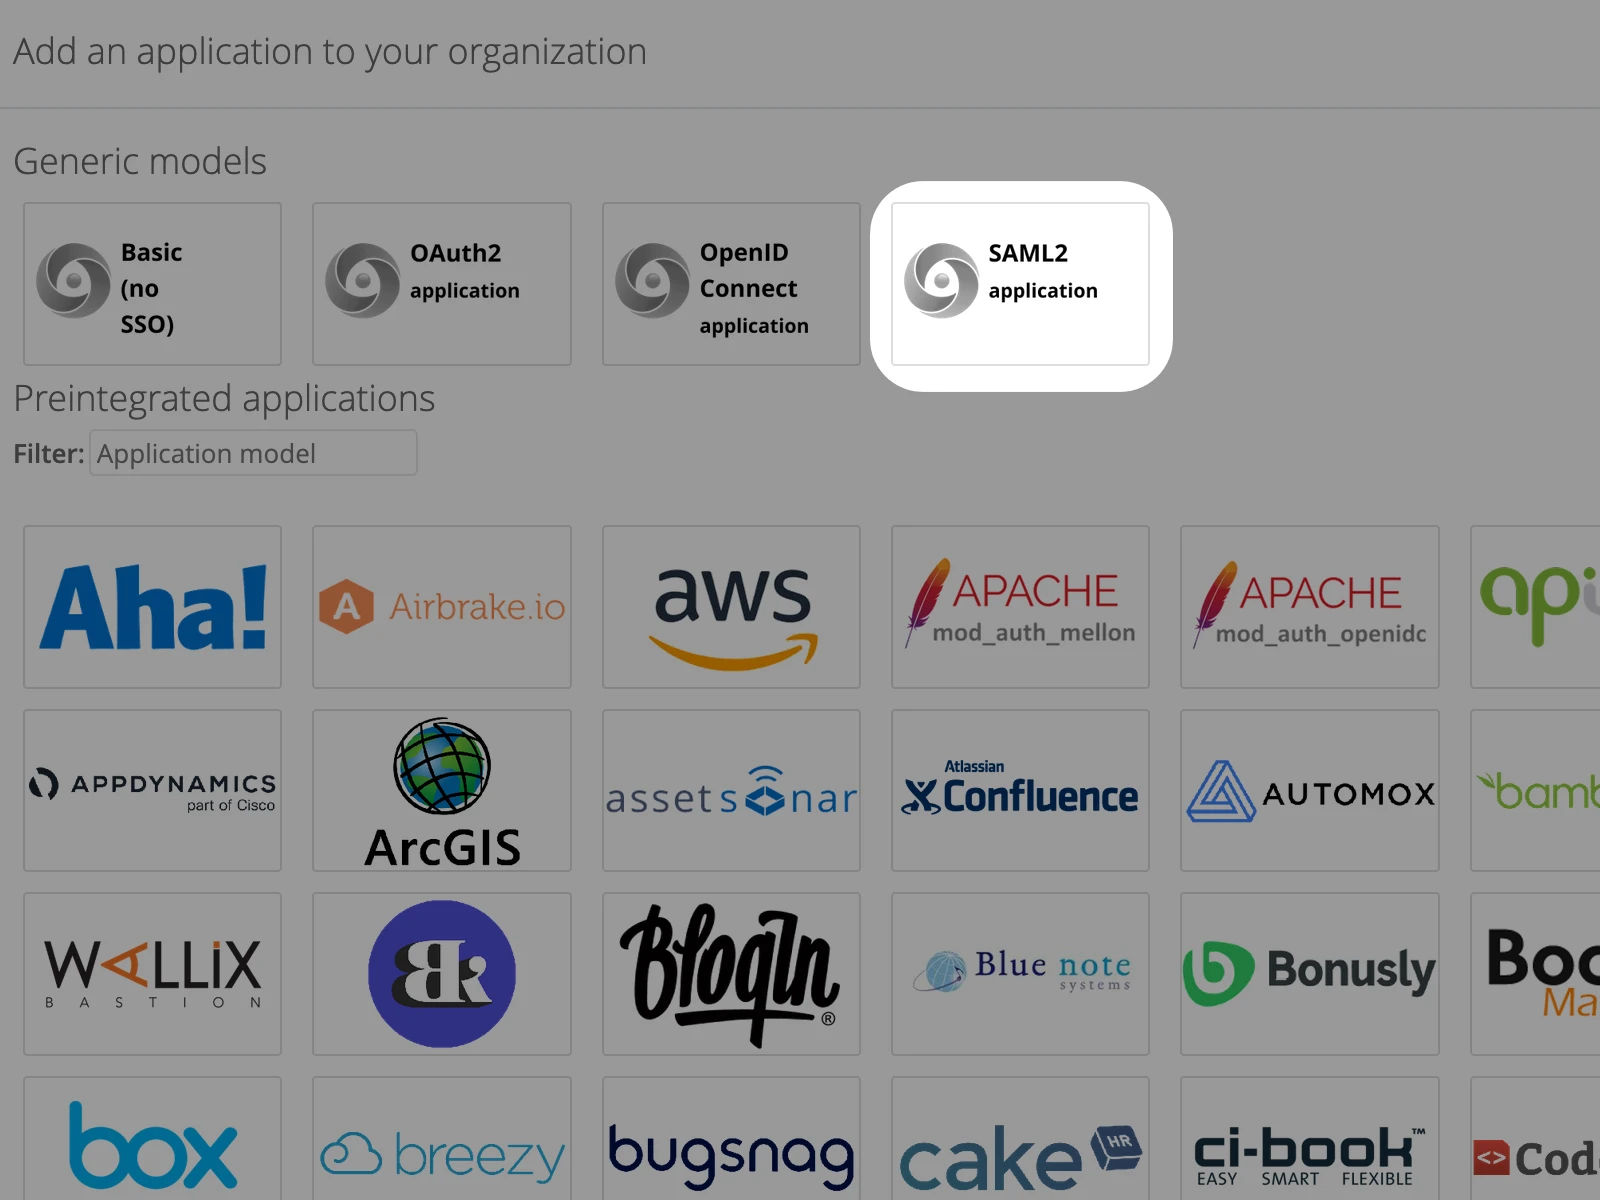
- In the "Generic models" section select "SAML2 application"
SAML configuration
- You should see a summary of your application. To begin select a relevant name.
- (Optional) You can also set a new icon.
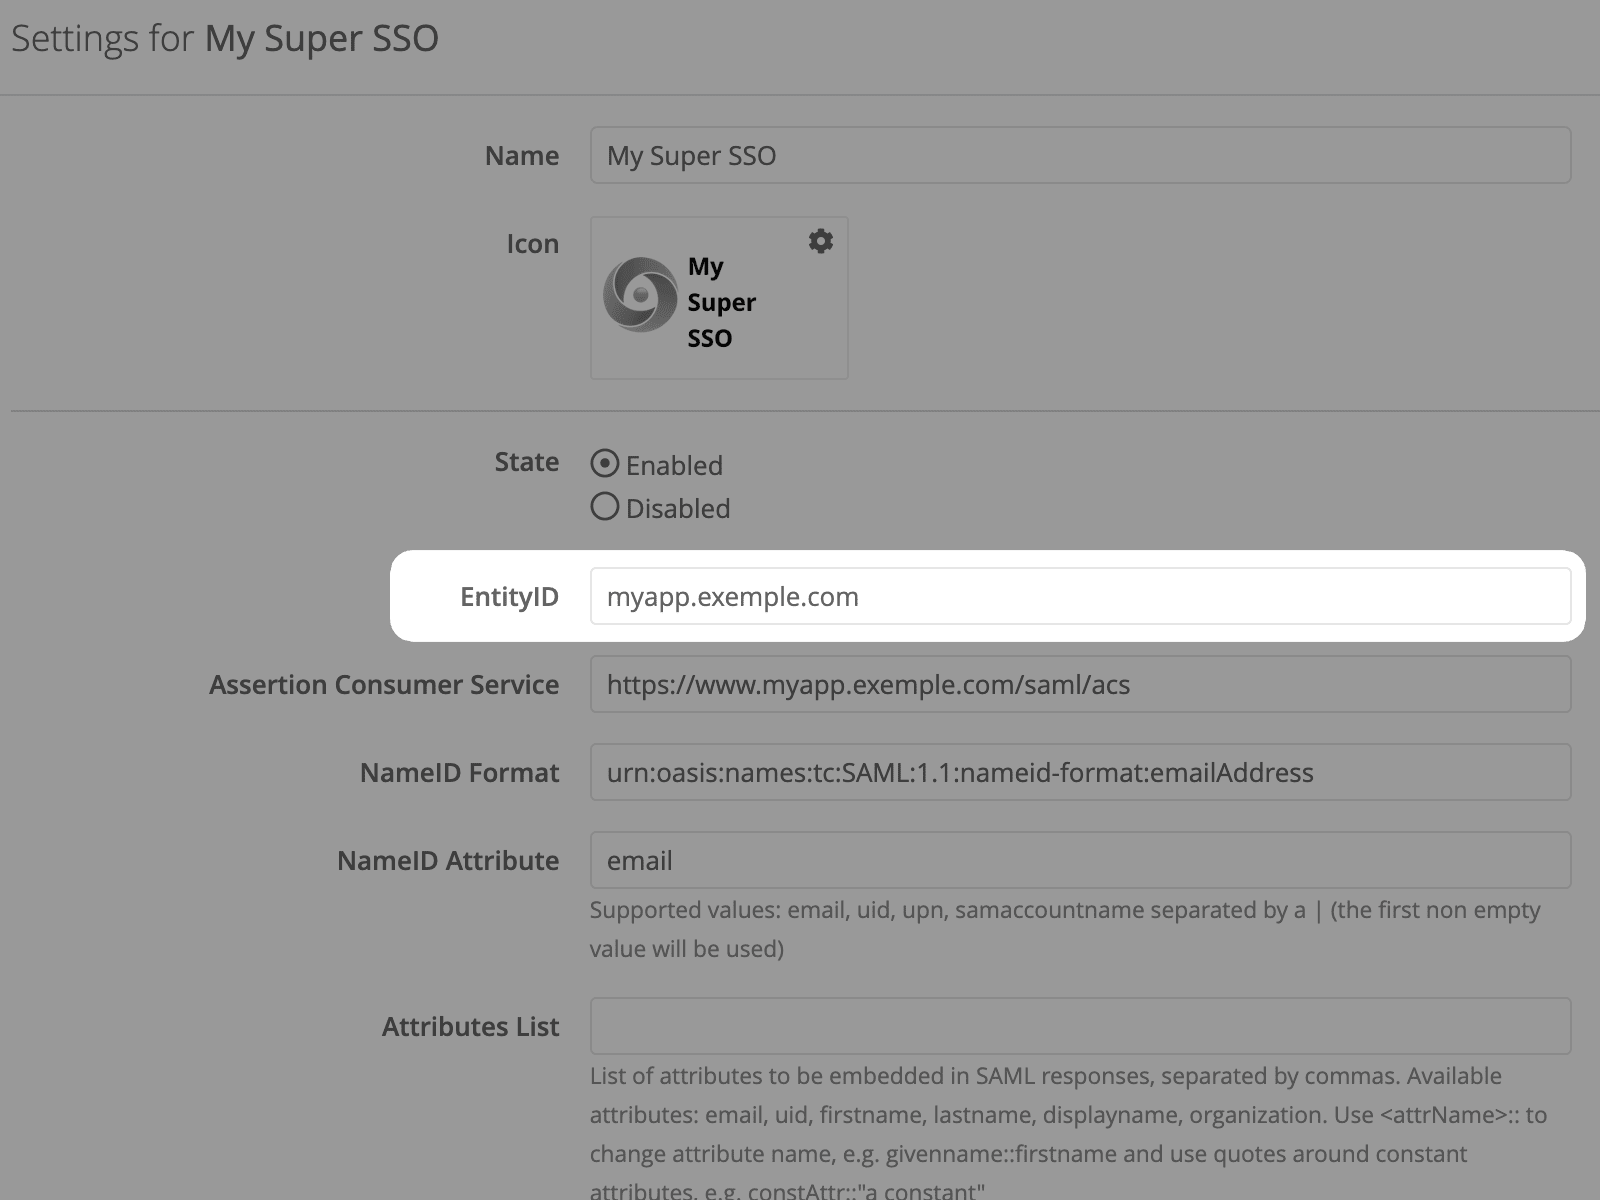
- Then, leave state as "Enabled"
- Below you should be able to set the Entity ID. Copy and paste the one on the right of this tutorial 👉
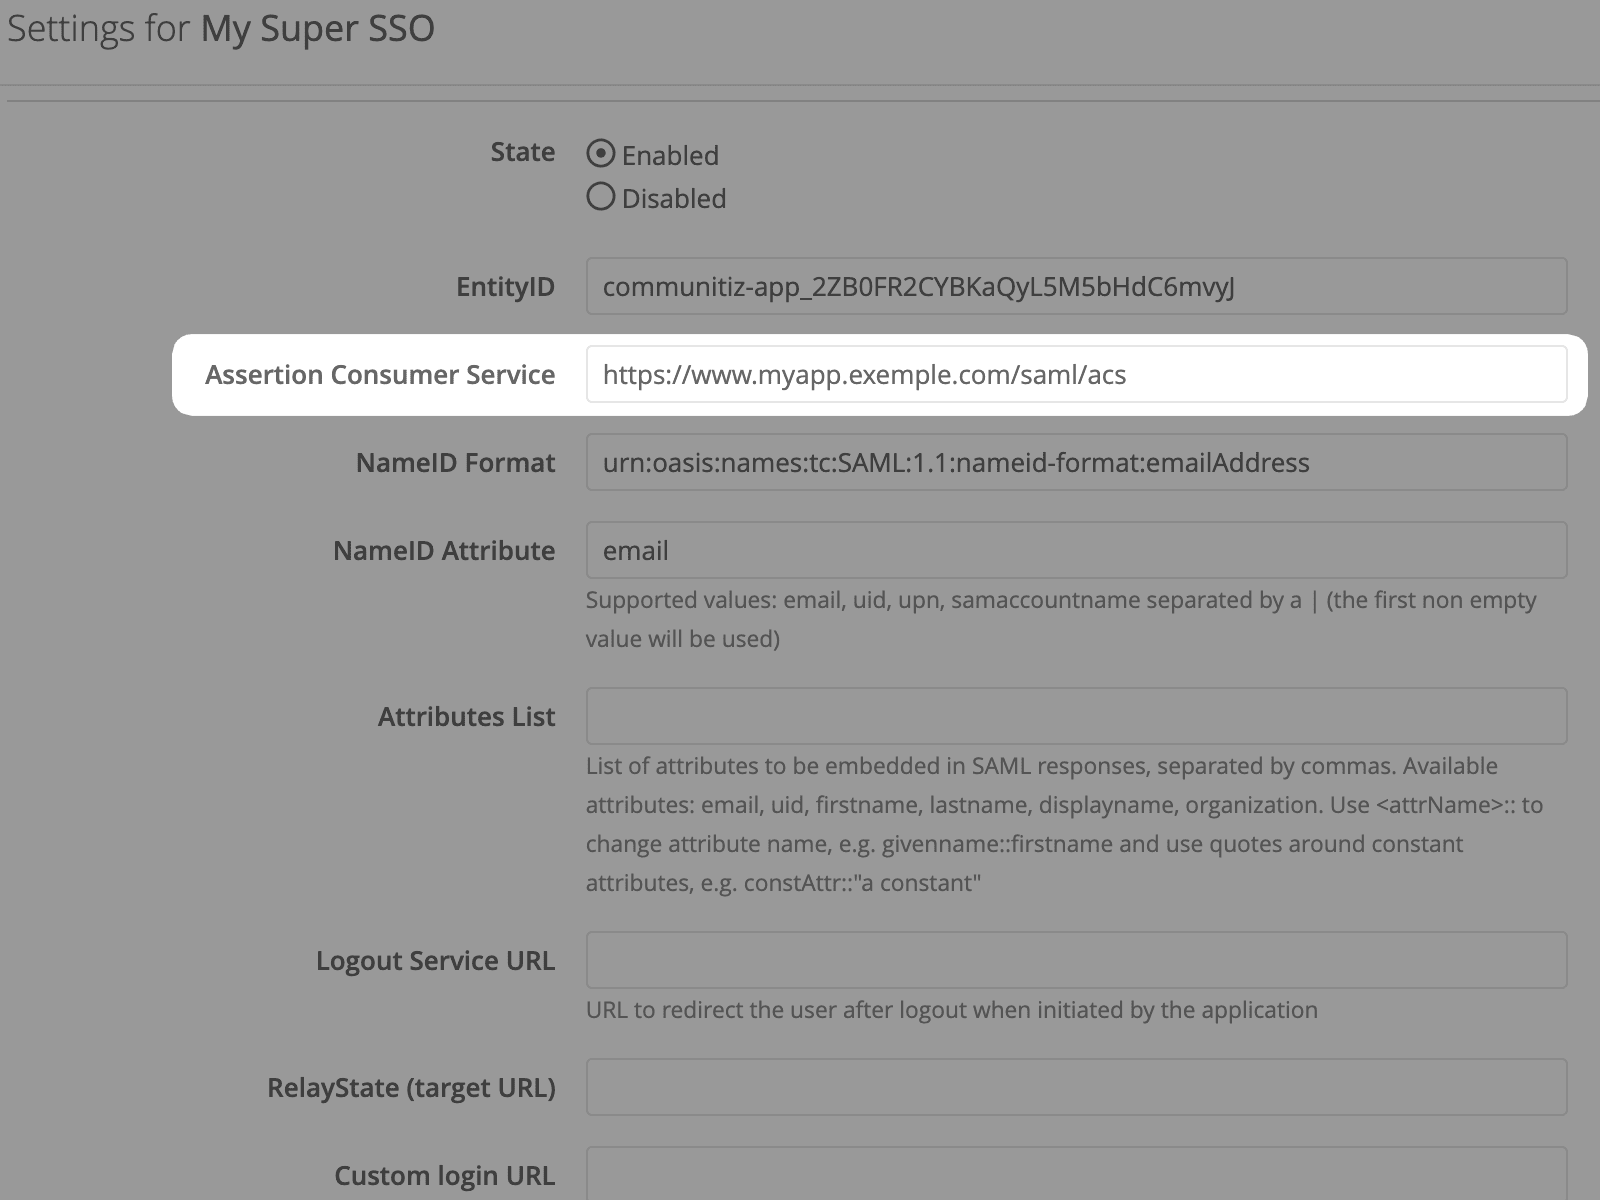
- Further down the page, you should be able to set the "Assertion Consumer Service". Copy and paste the one on the right 👉
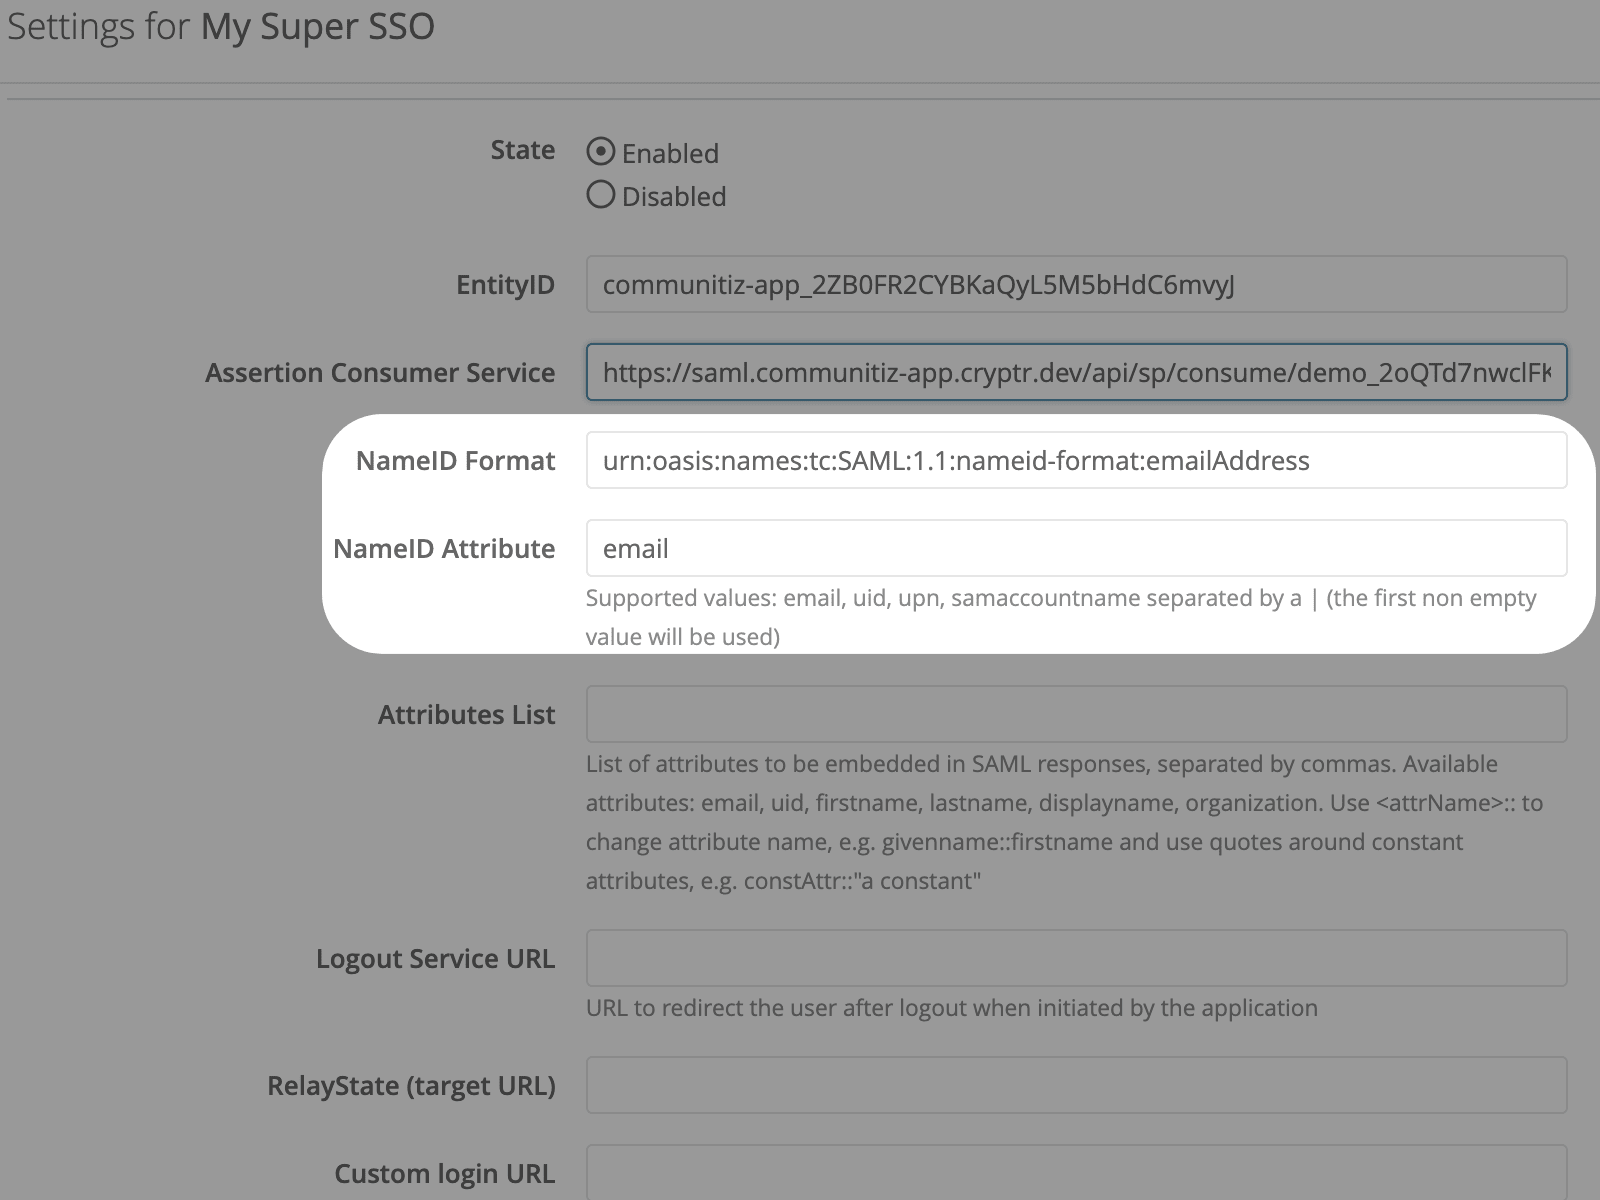
- Then, simply leave the default value for "NameID Format"
- You can also leave the default value for "NameID Attribute"
Attributes Mapping
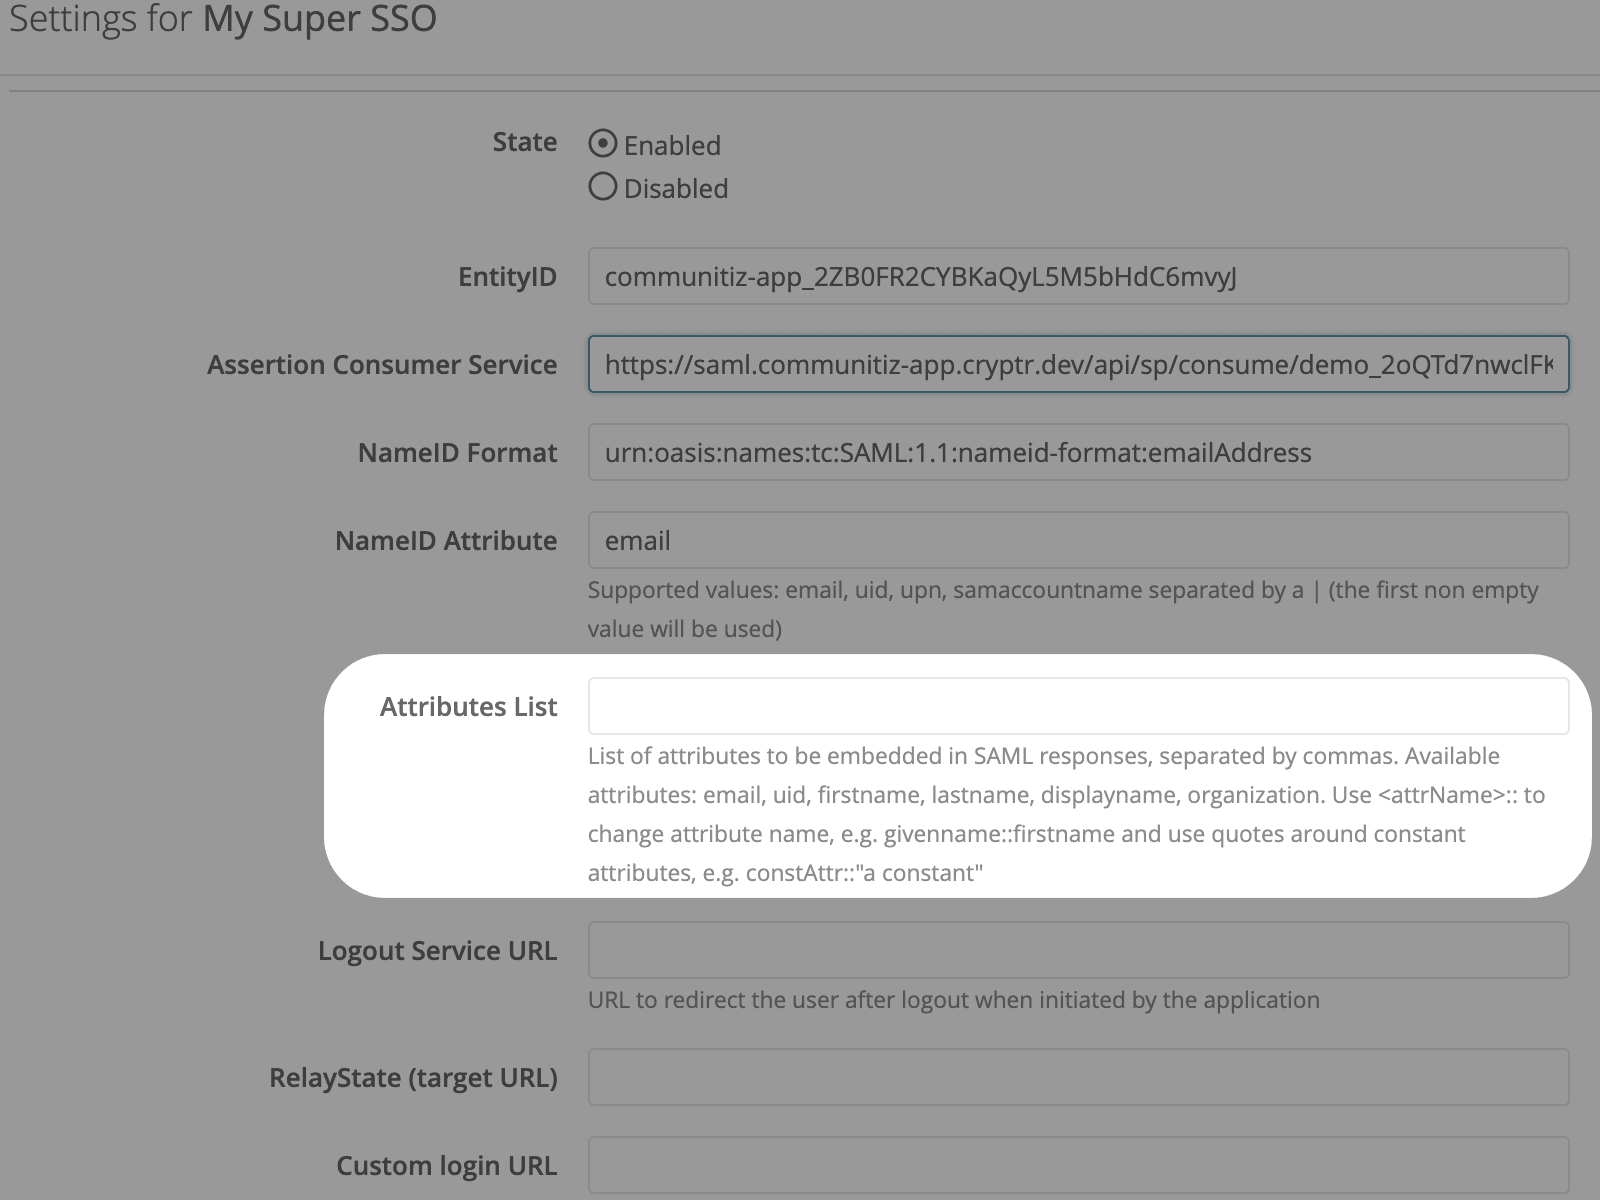
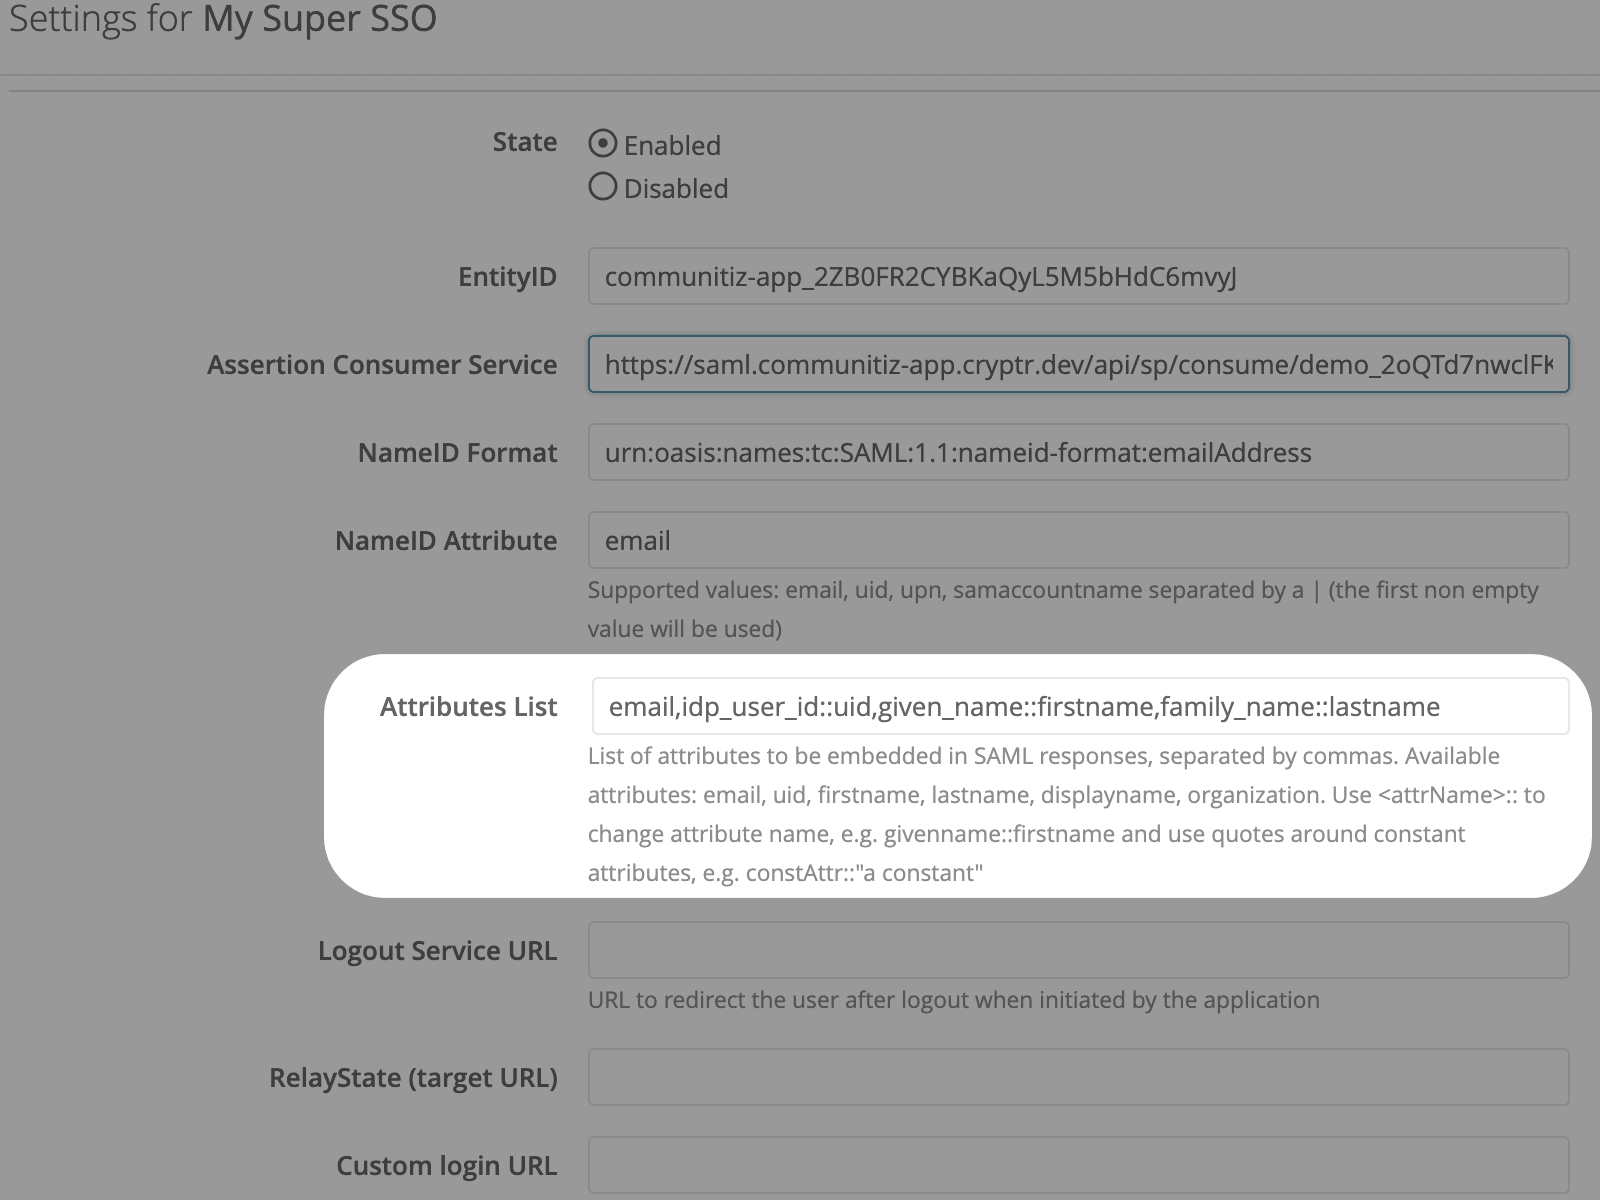
- In the "Attributes List" section, please fill out the fields as shown above.
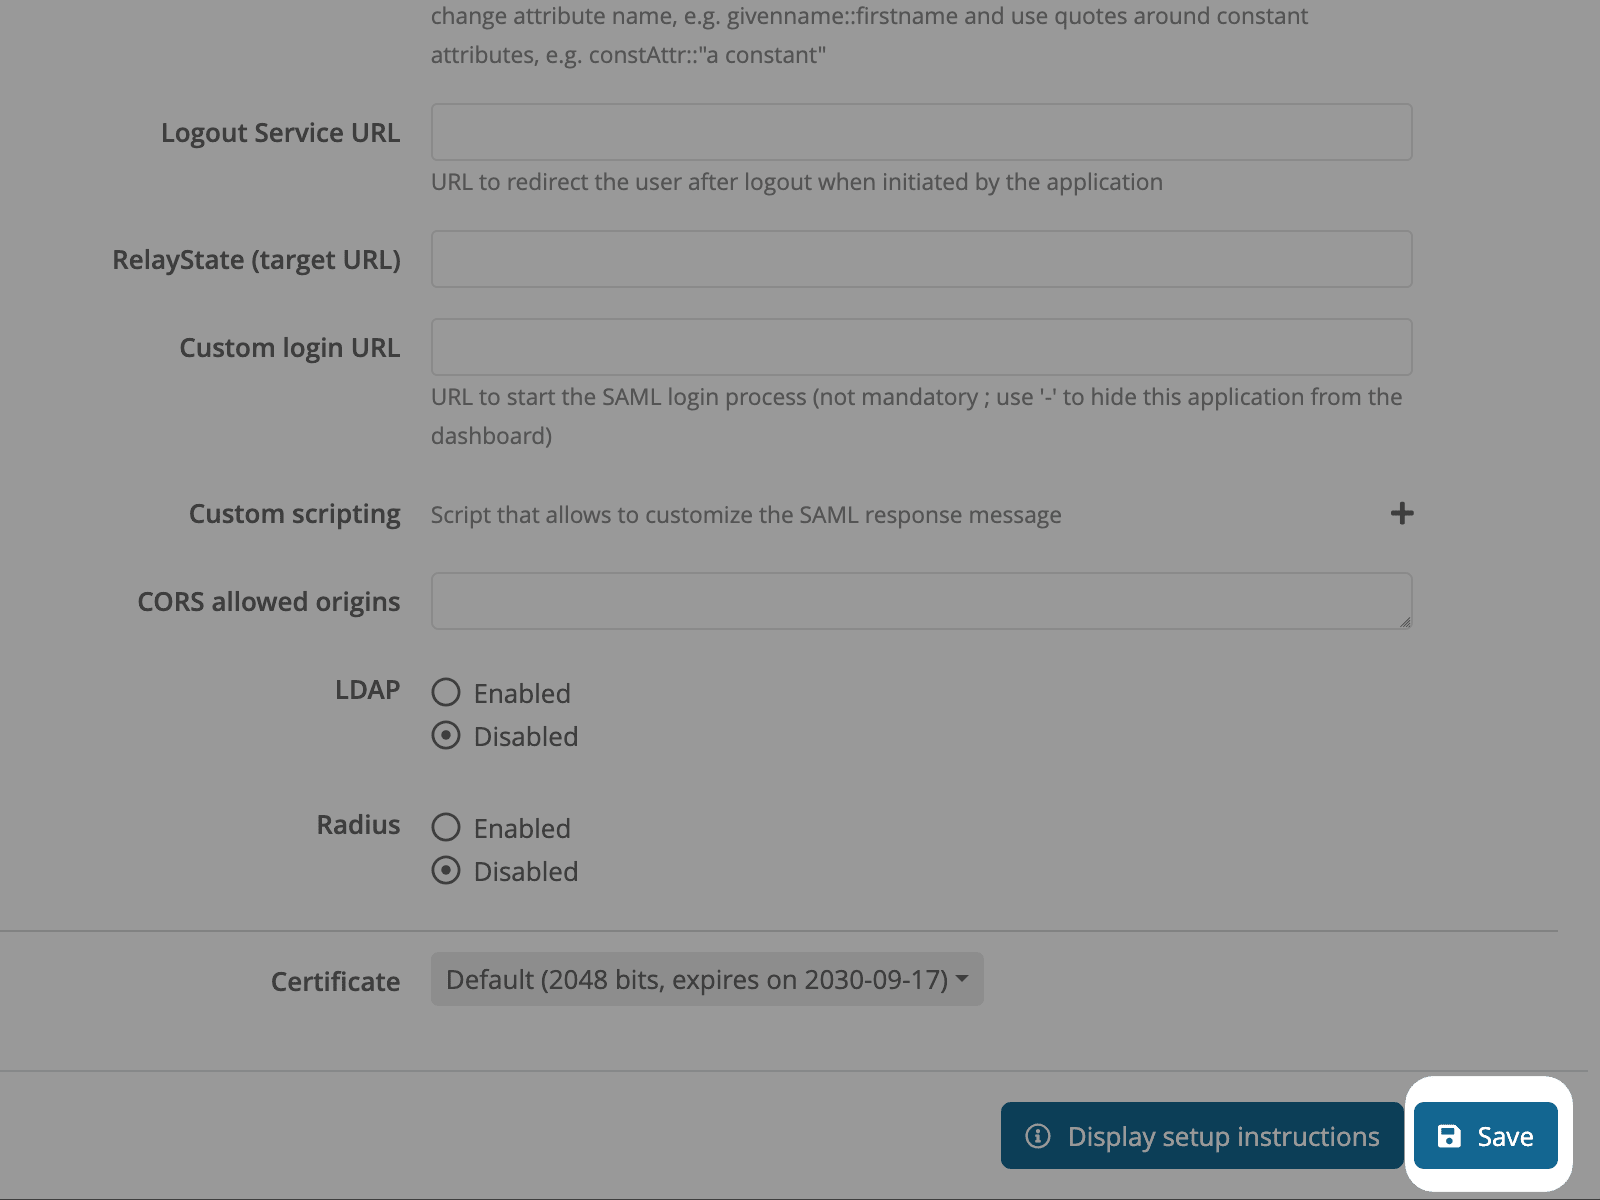
- You can now save your configuration by clicking "Save" at the bottom right.
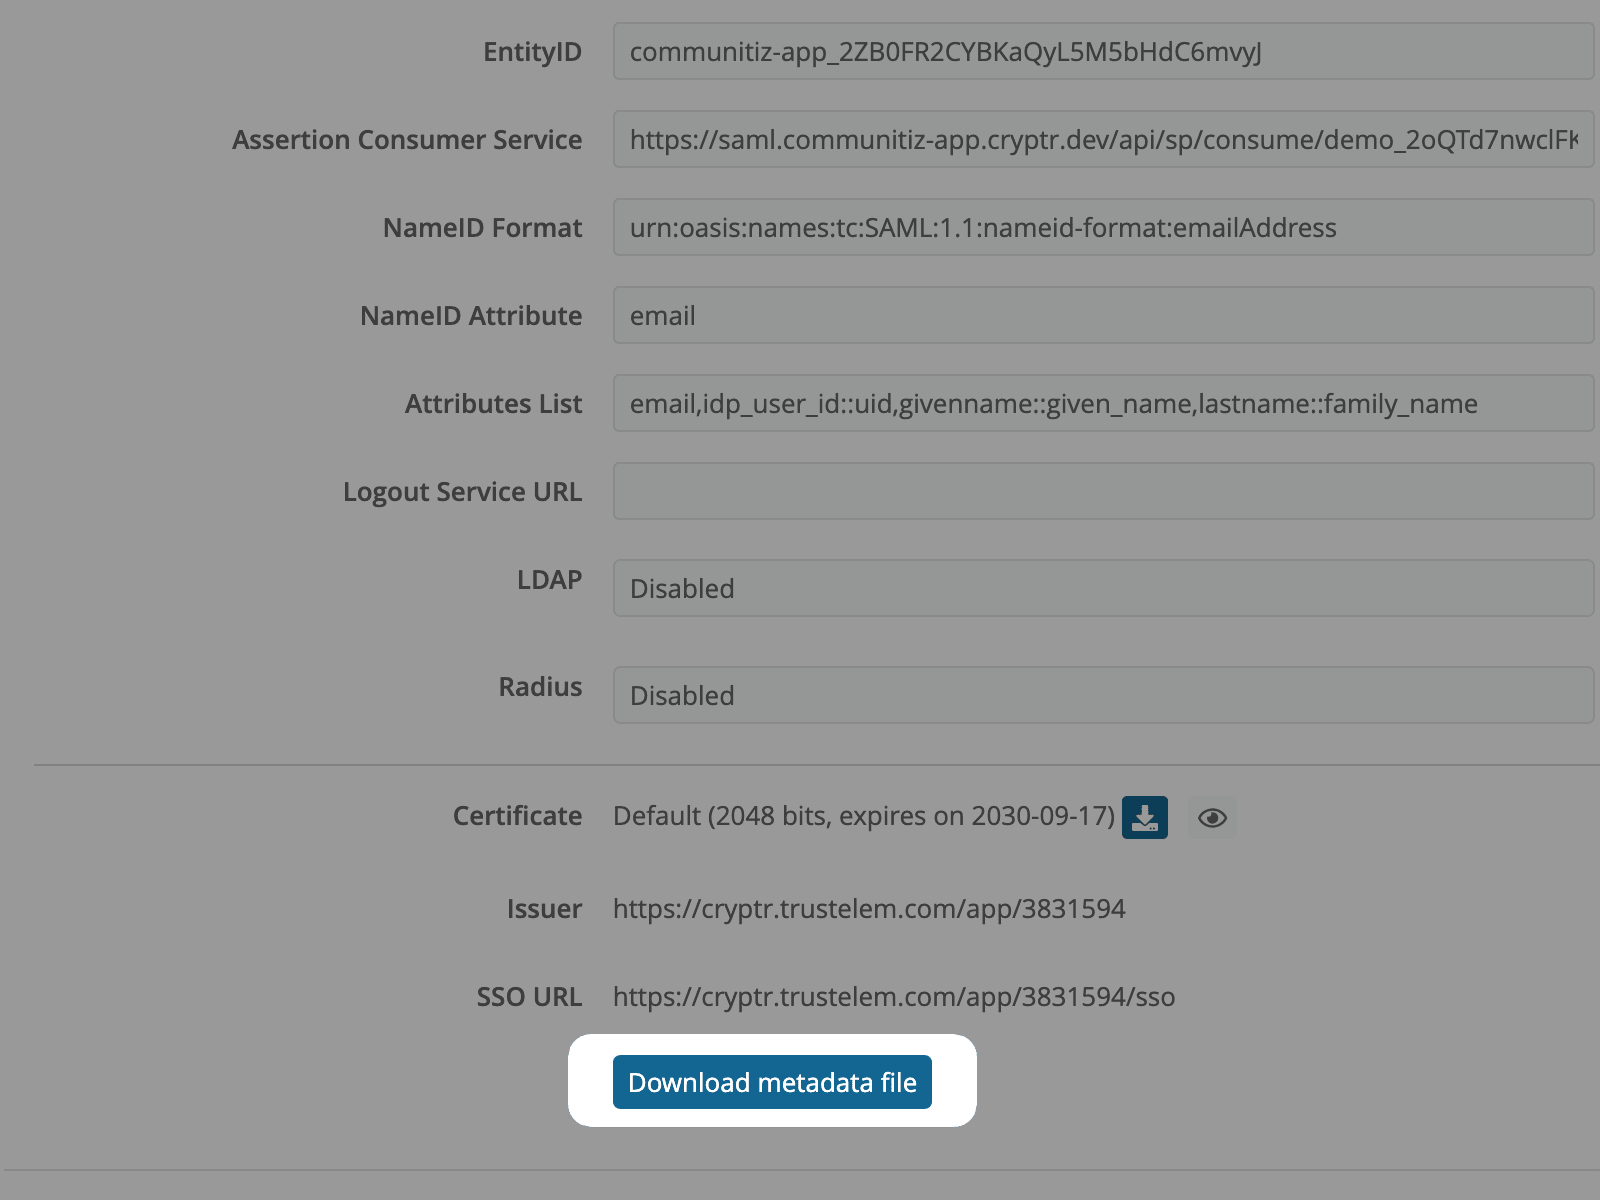
- Now scroll to the bottom of the edition form and click on “Download metadata file”
Metadata
Upload your previously downloaded Metadata file, then continue this tutorial.
Users and groups
- Your SAML application is ready. All you have to do now is add Users and Groups to your application.
- To do this, go to the “Access rules” tab in your Wallix interface.
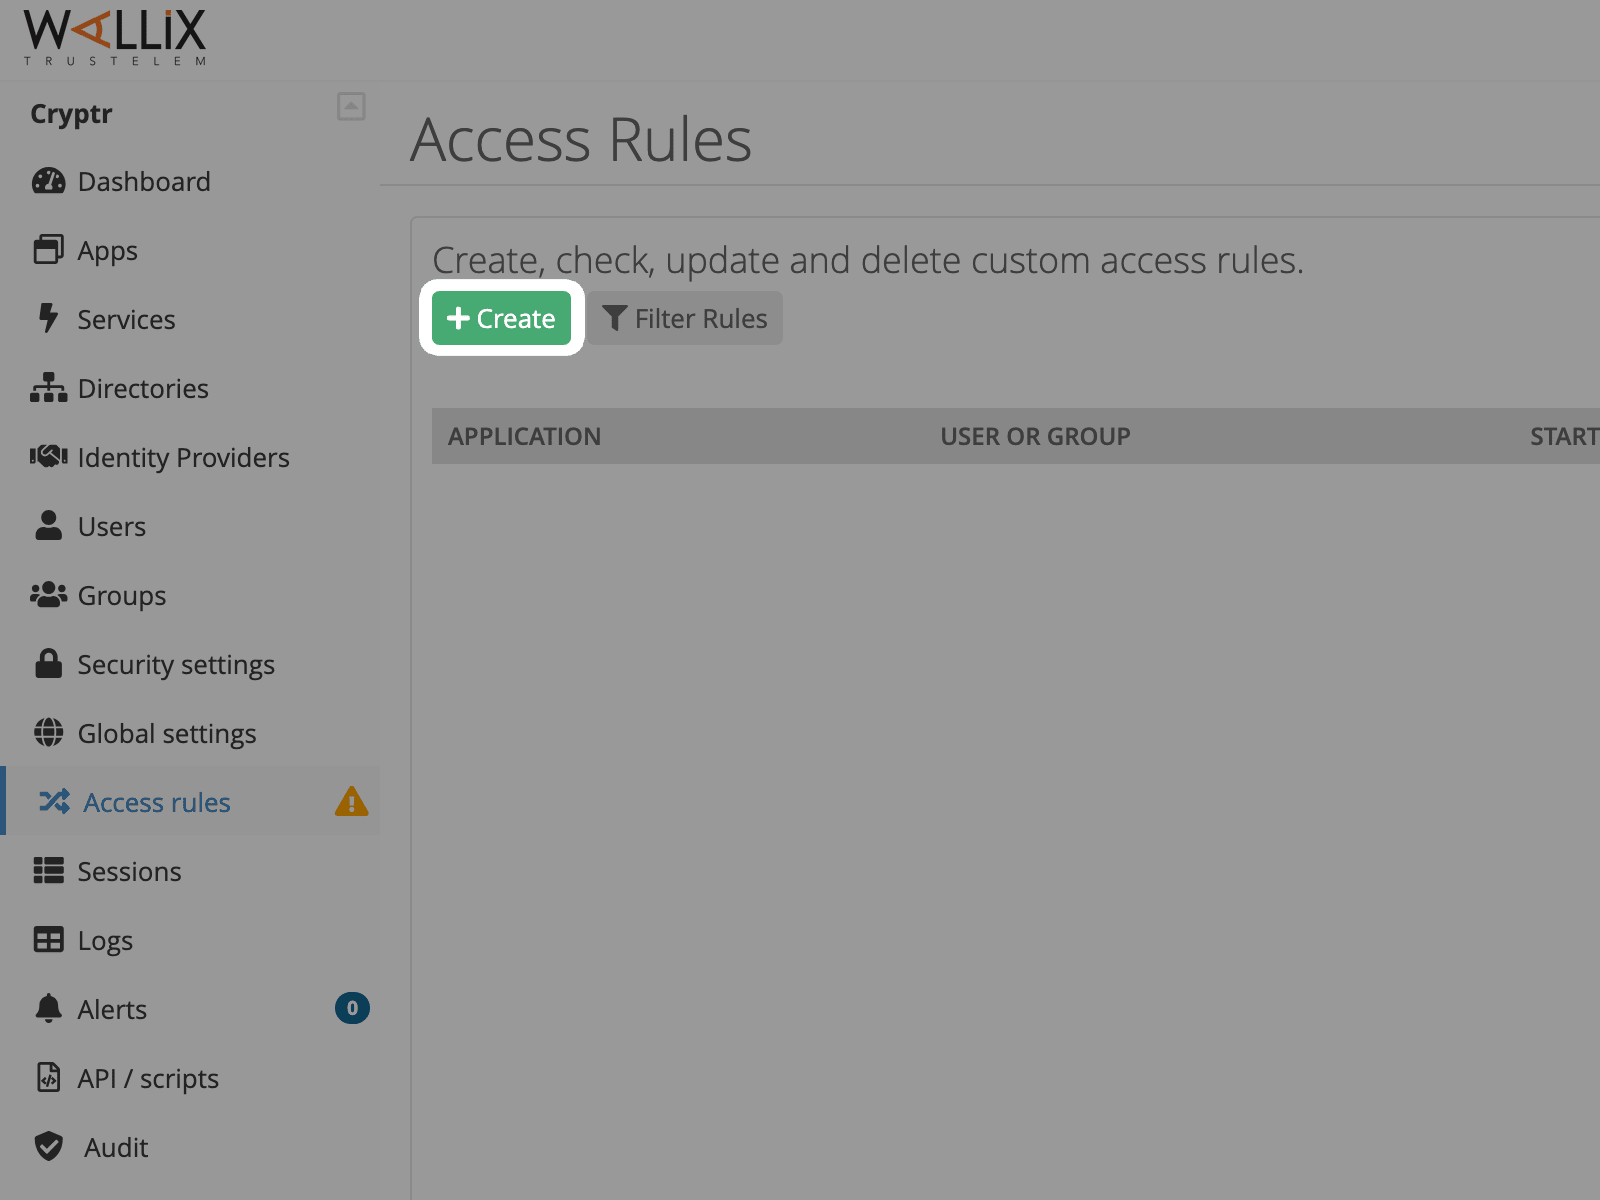
- You should see a list of your access rules. Click on "+ Create" to create a new one.
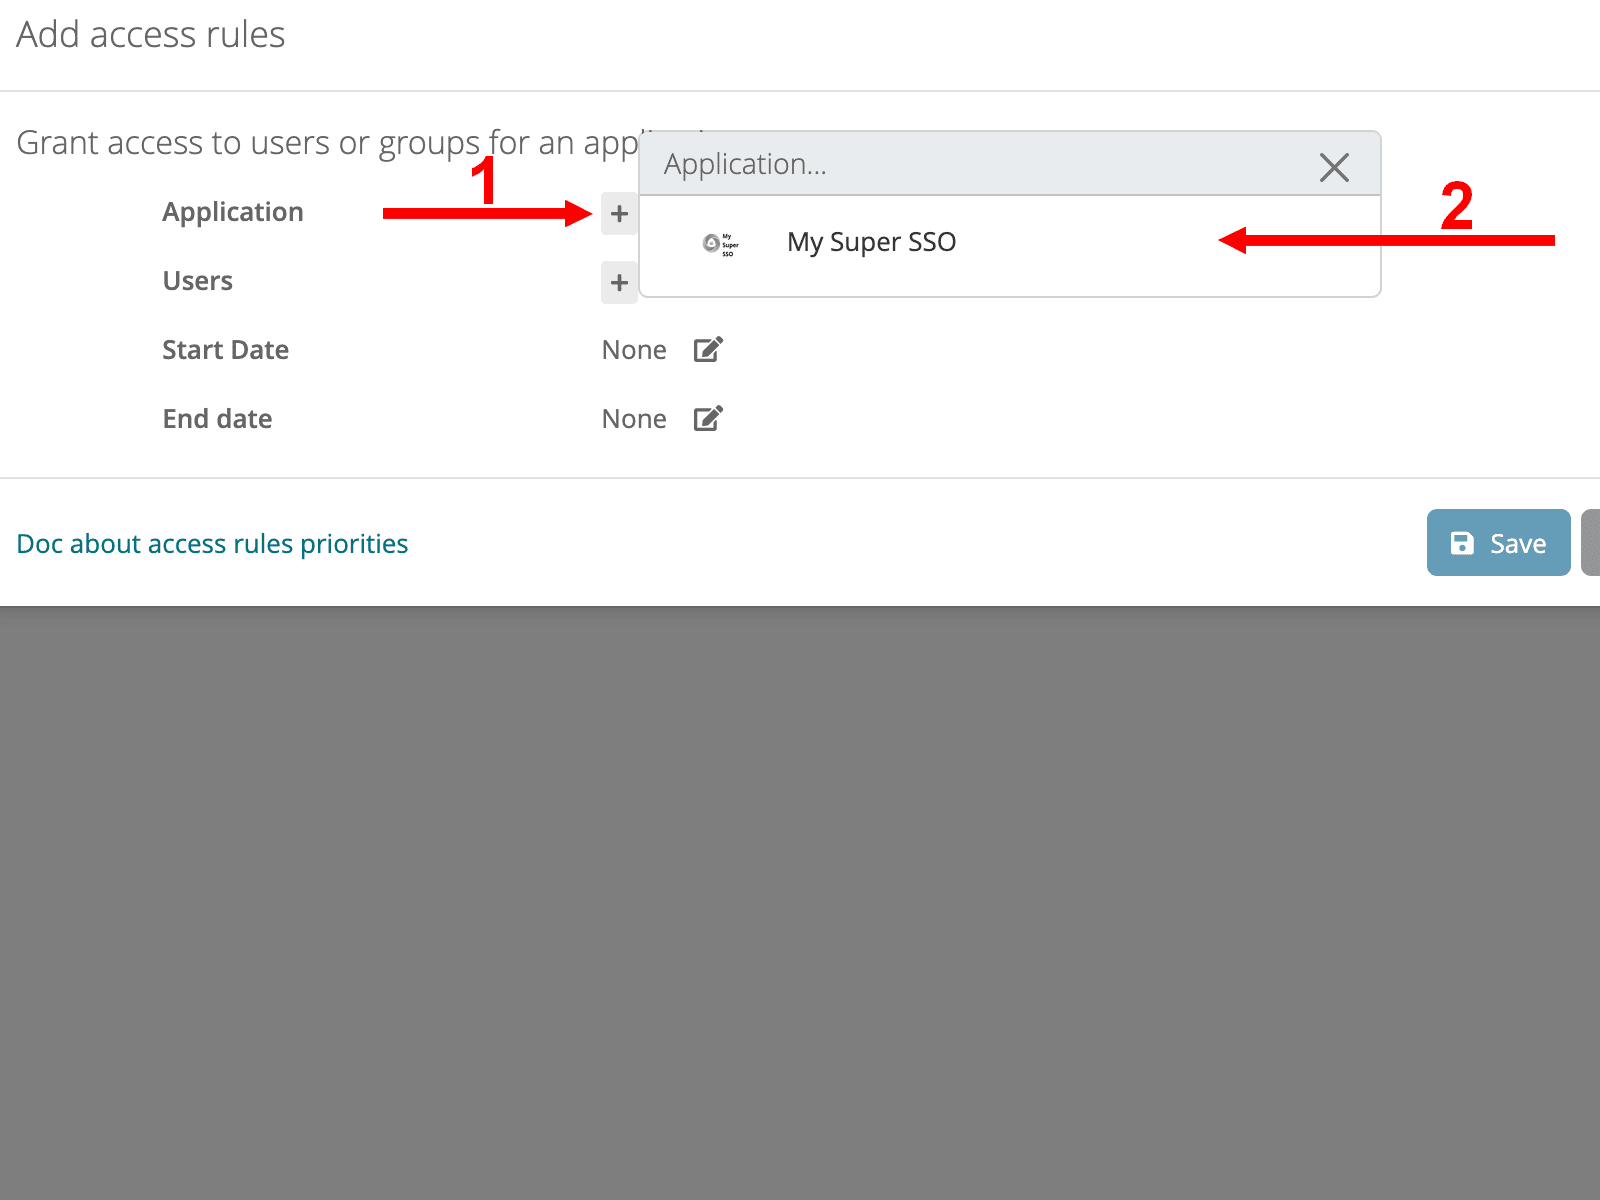
- On this new form, click on the "+" to the right of Application.
- Select your newly created SSO Application.
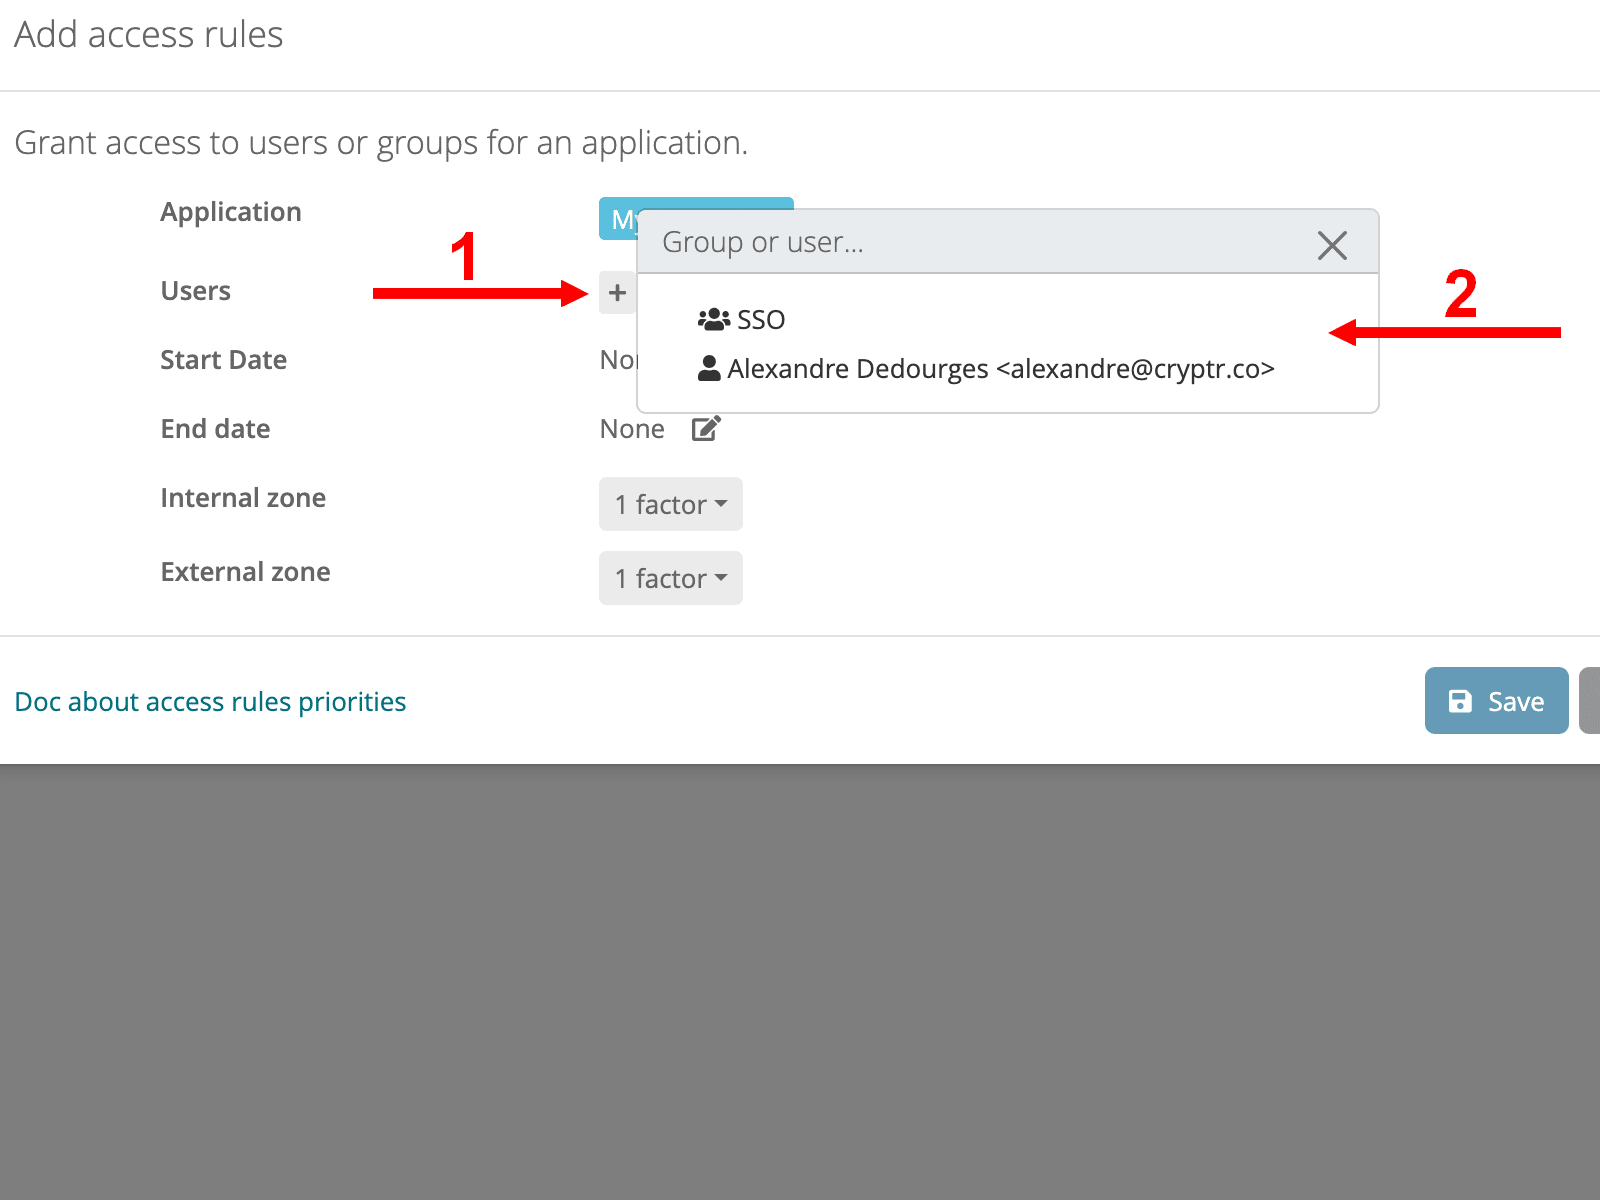
- Now click on the "+" to the right of Users.
- Select your Groups and/or Users.
- Then select Start, End dates, Internal and External zones if relevant and hit "Save"
Test SSO login
Test SSO login