Jumpcloud
Discover step-by-step instructions on configuring a connection with Jumpcloud. Learn how to integrate your application with Jumpcloud to secure and streamlined SSO authentication.
How to start
- Login to your Jumpcloud account.
Create the SSO Application
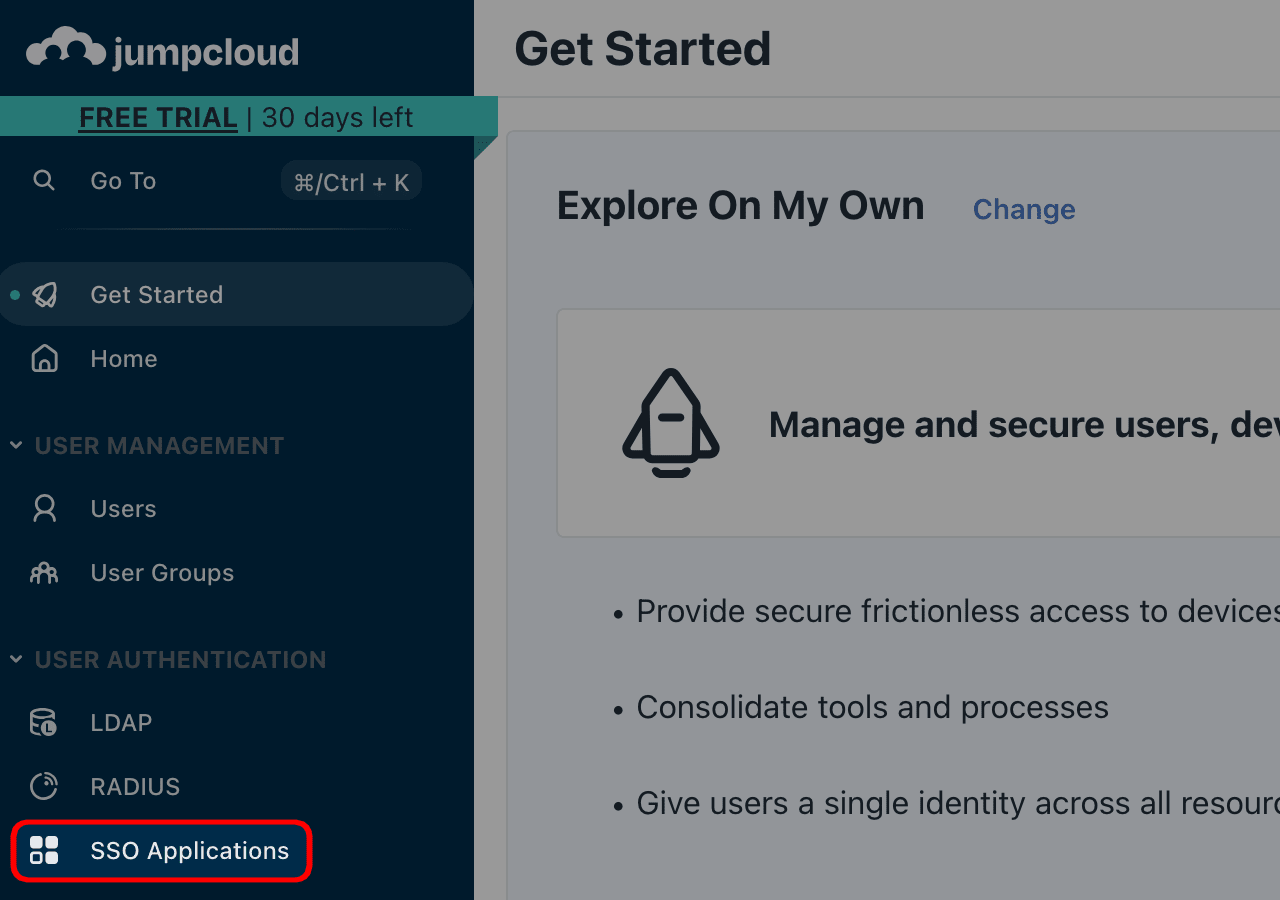
- In the vertical bar on the left side of your screen, click on “SSO Applications”.
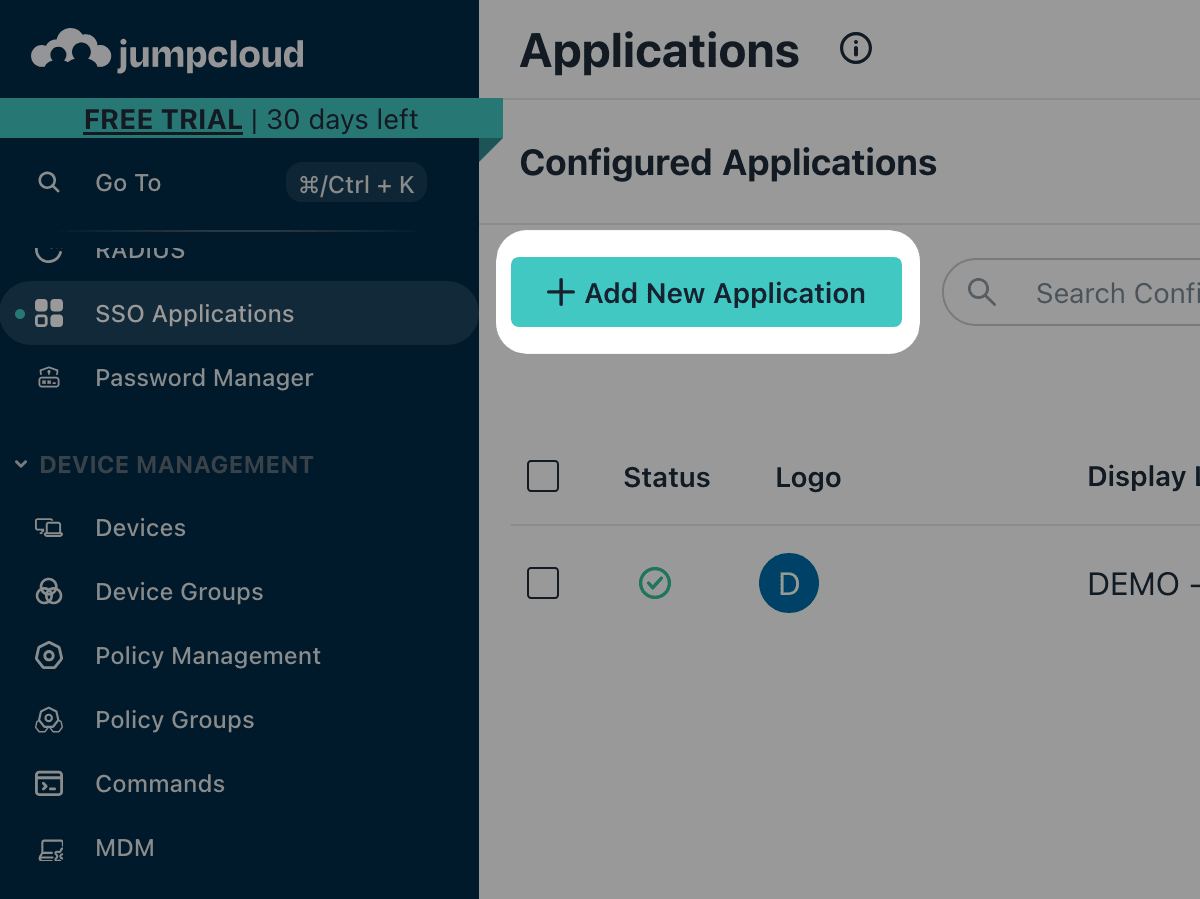
- You should see a list of your SSO applications. Click on “+ Add New Application.”
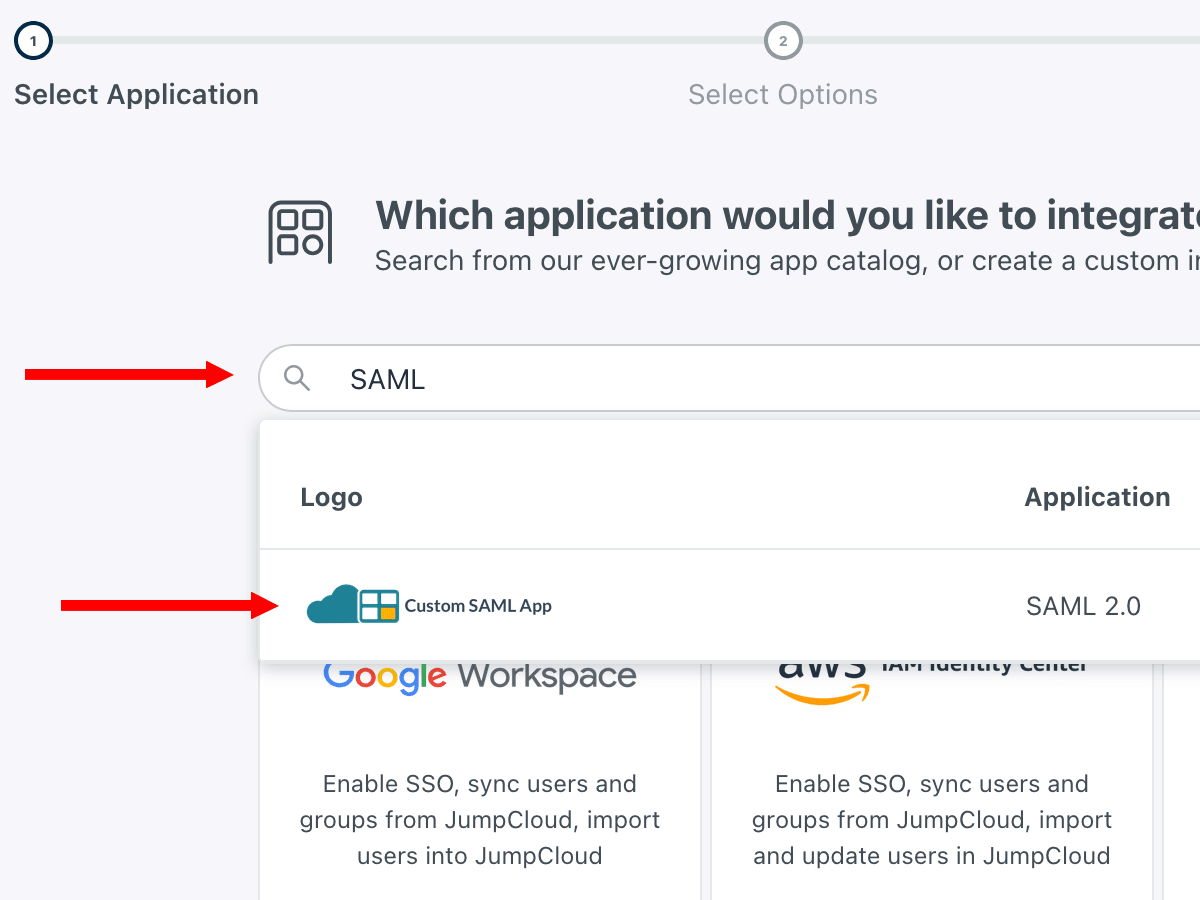
- In the search bar, simply enter “SAML.” The only option remaining should be “Custom SAML App.”
- Click on “Custom SAML App”
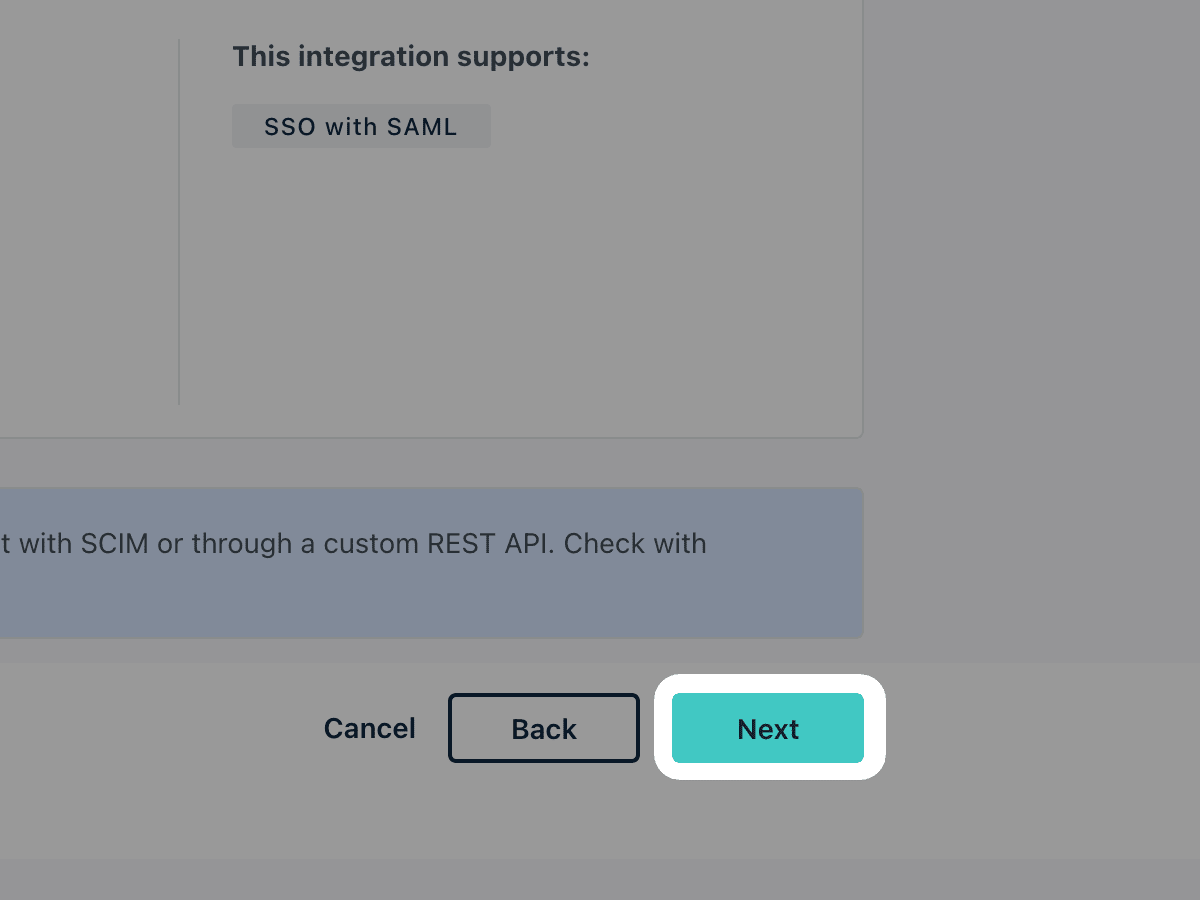
- Confirm your selection by clicking “Next”
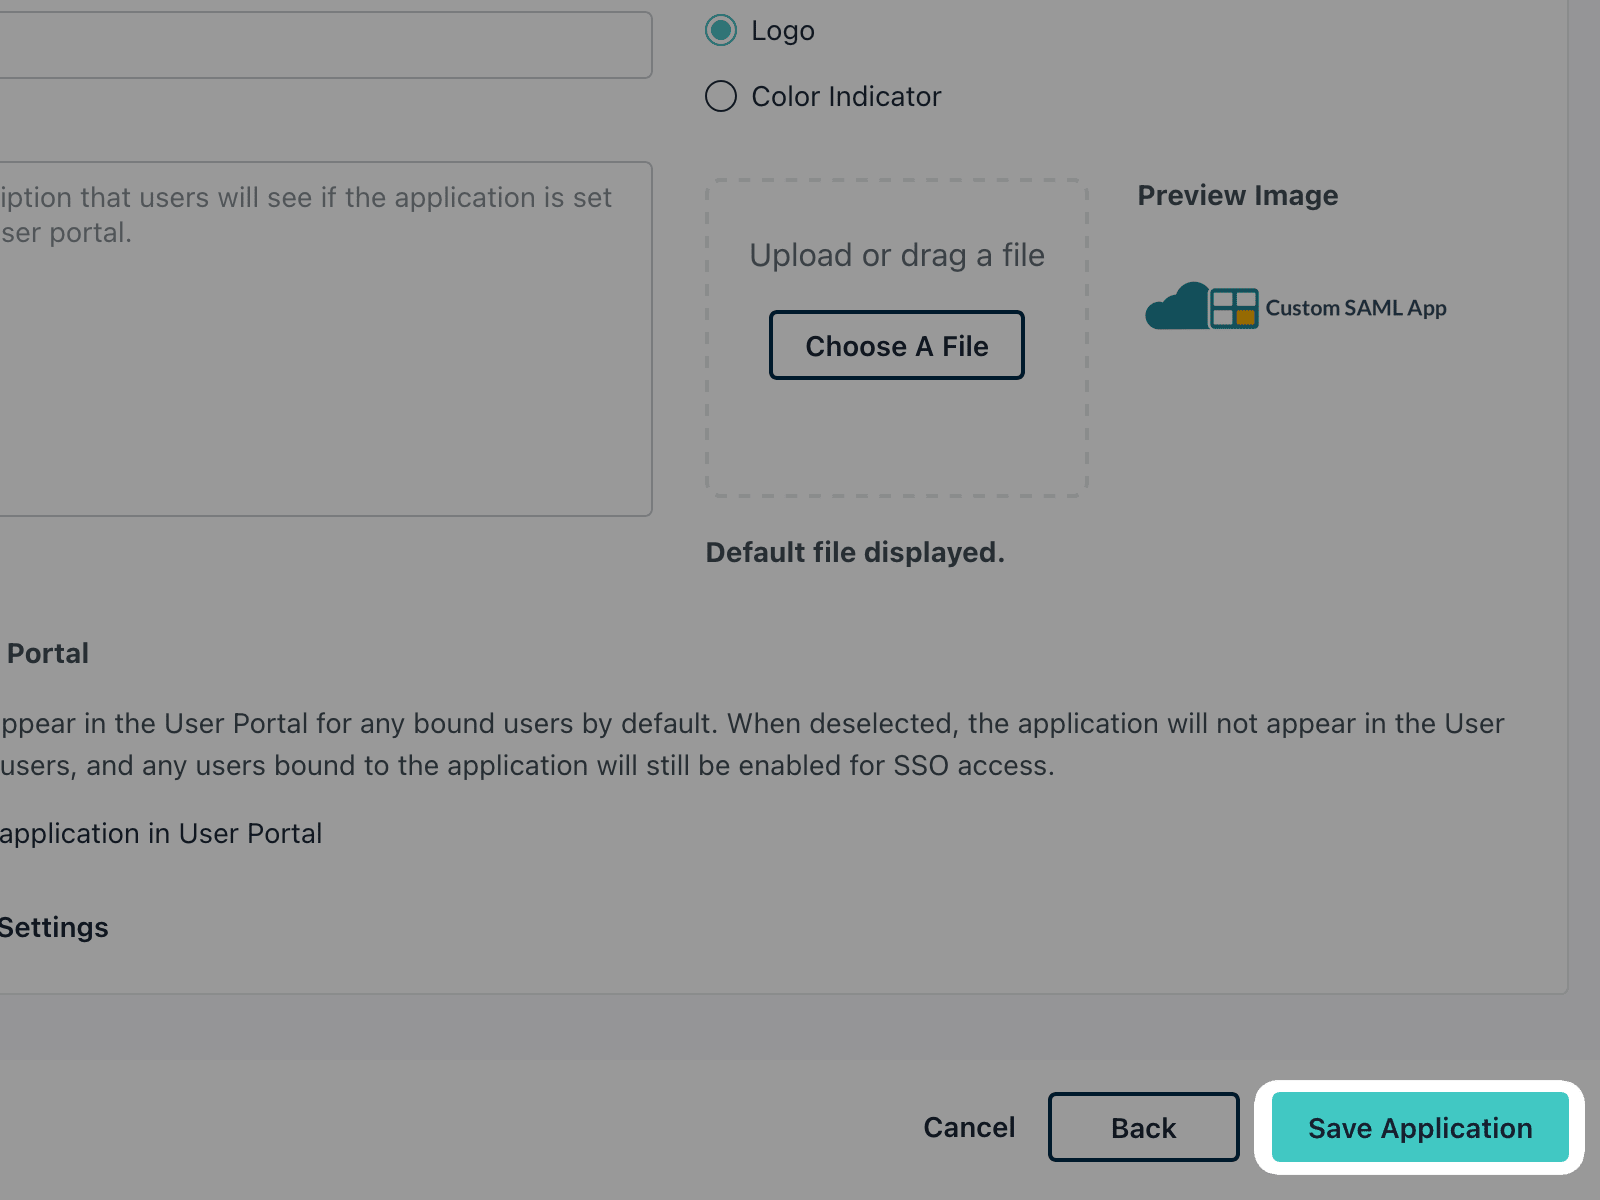
- Create your SAML Application by clicking "Save Application"
SAML configuration
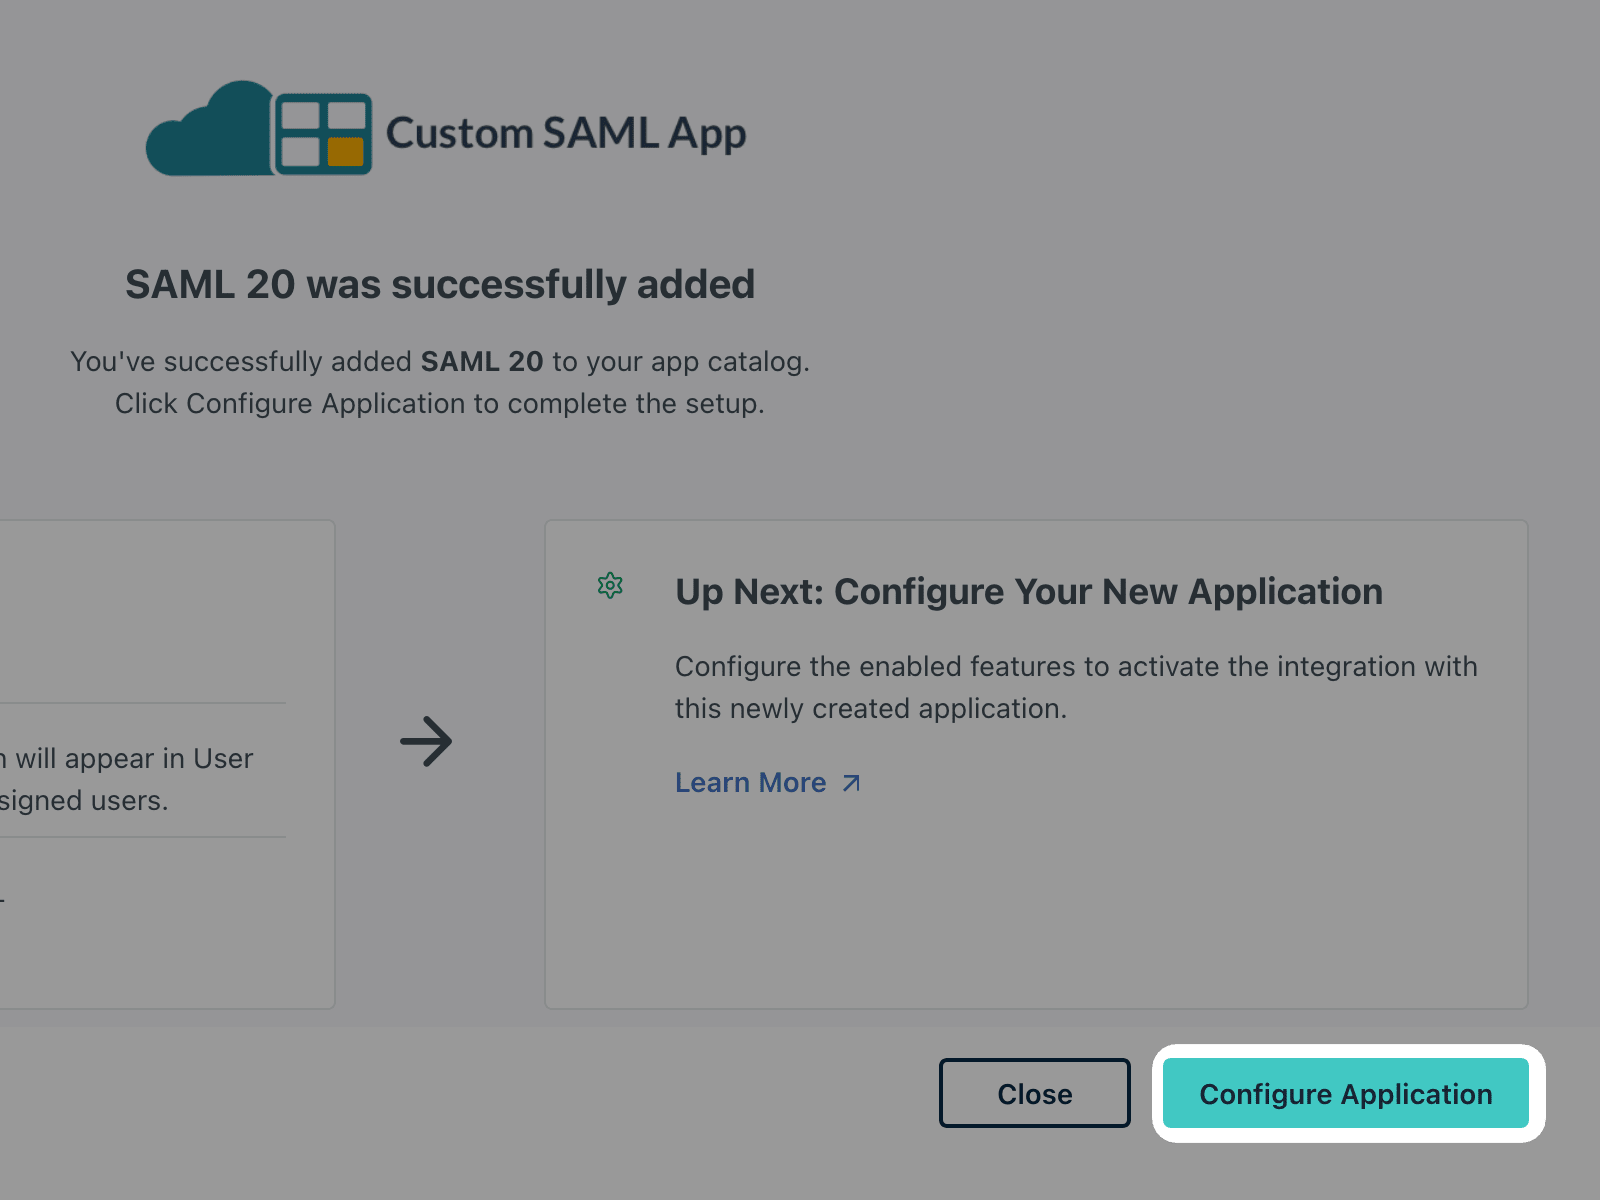
- You should see a summary of your application. Tap “Configure Application” to begin configuration.
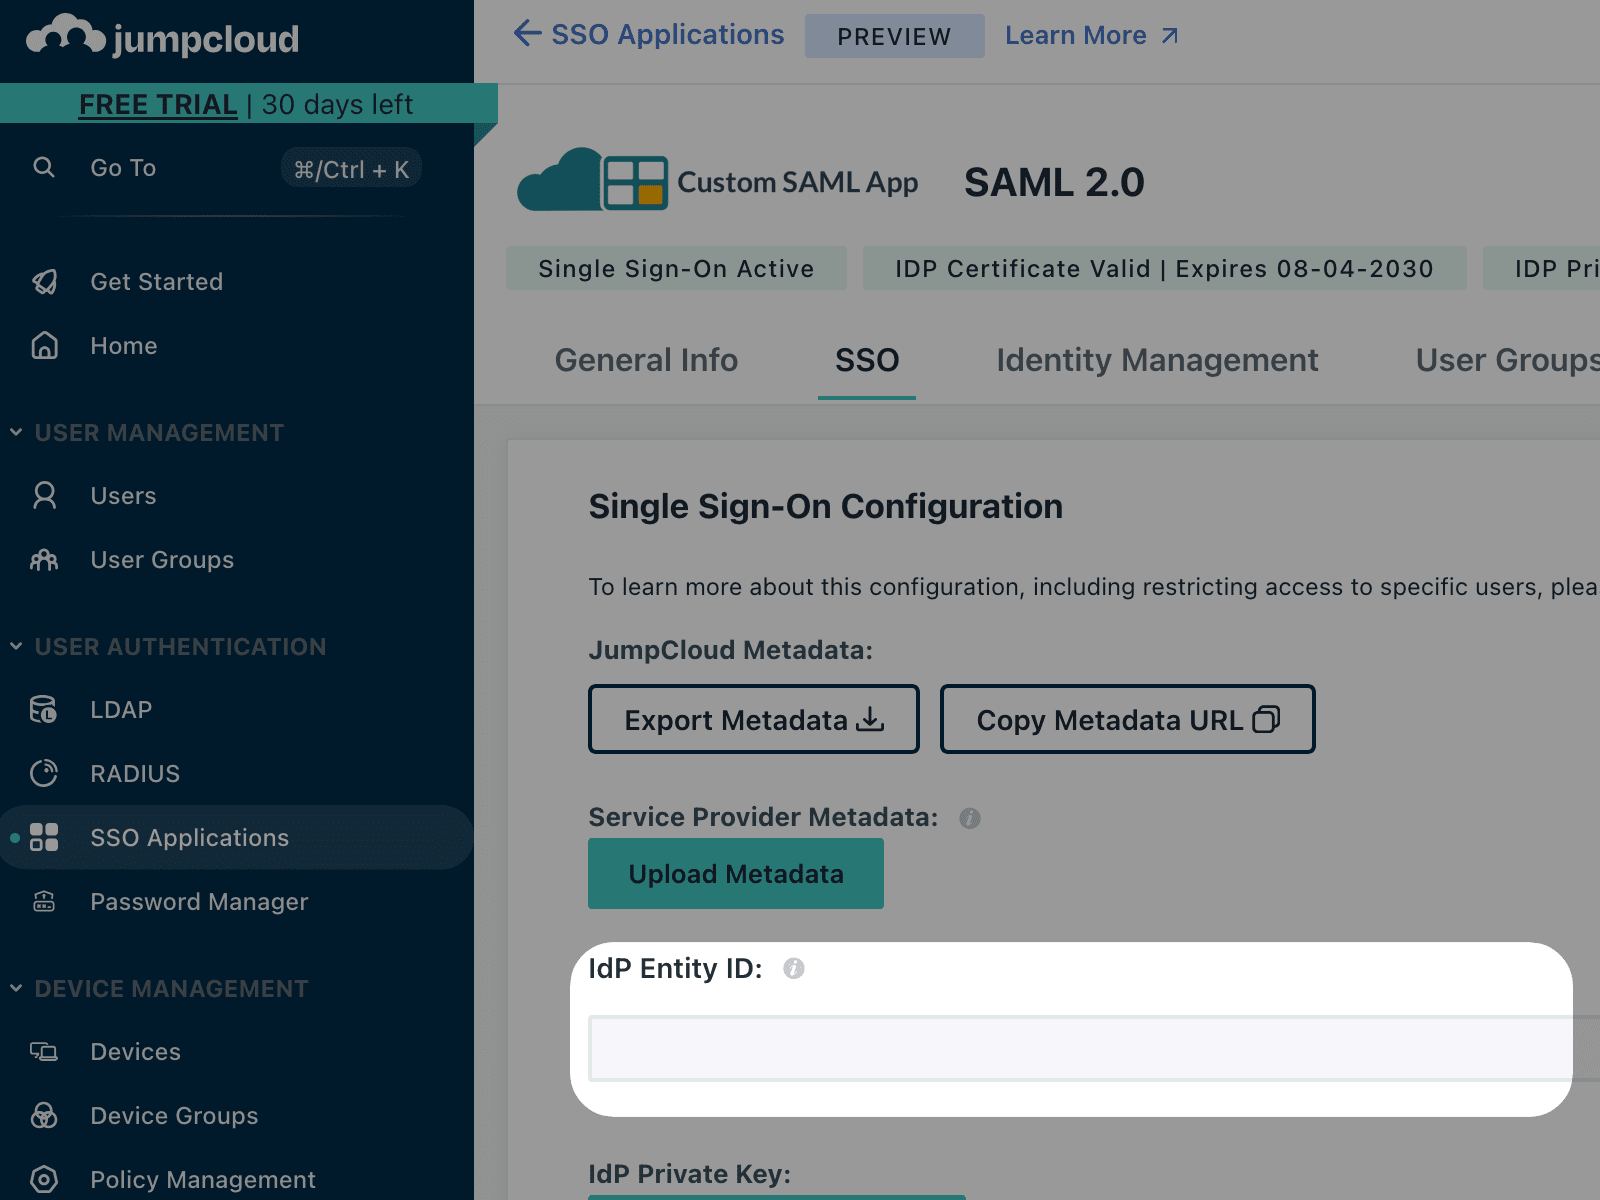
- First, we need to choose an Entity ID. You can enter whatever you want. Choose something that will allow you to easily find the application.
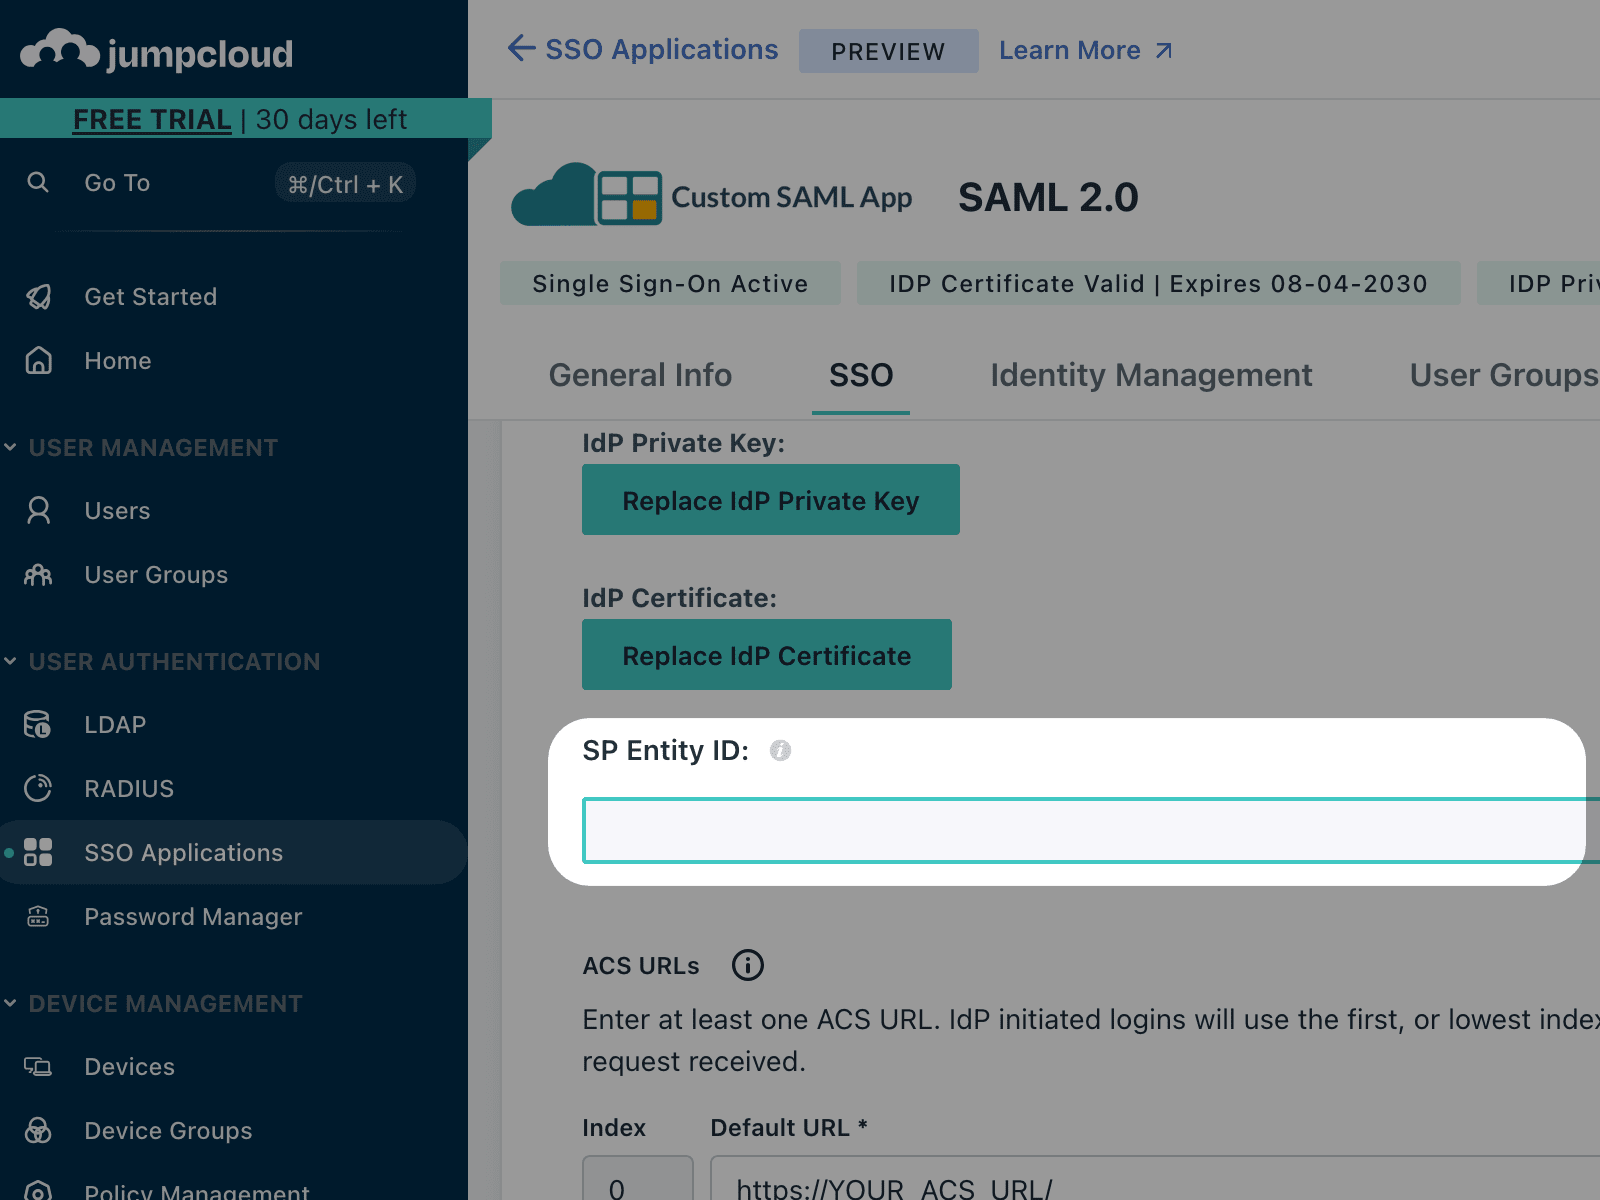
- Further down the page, you should be able to set the SP Entity ID. Copy and paste the one on the right 👉
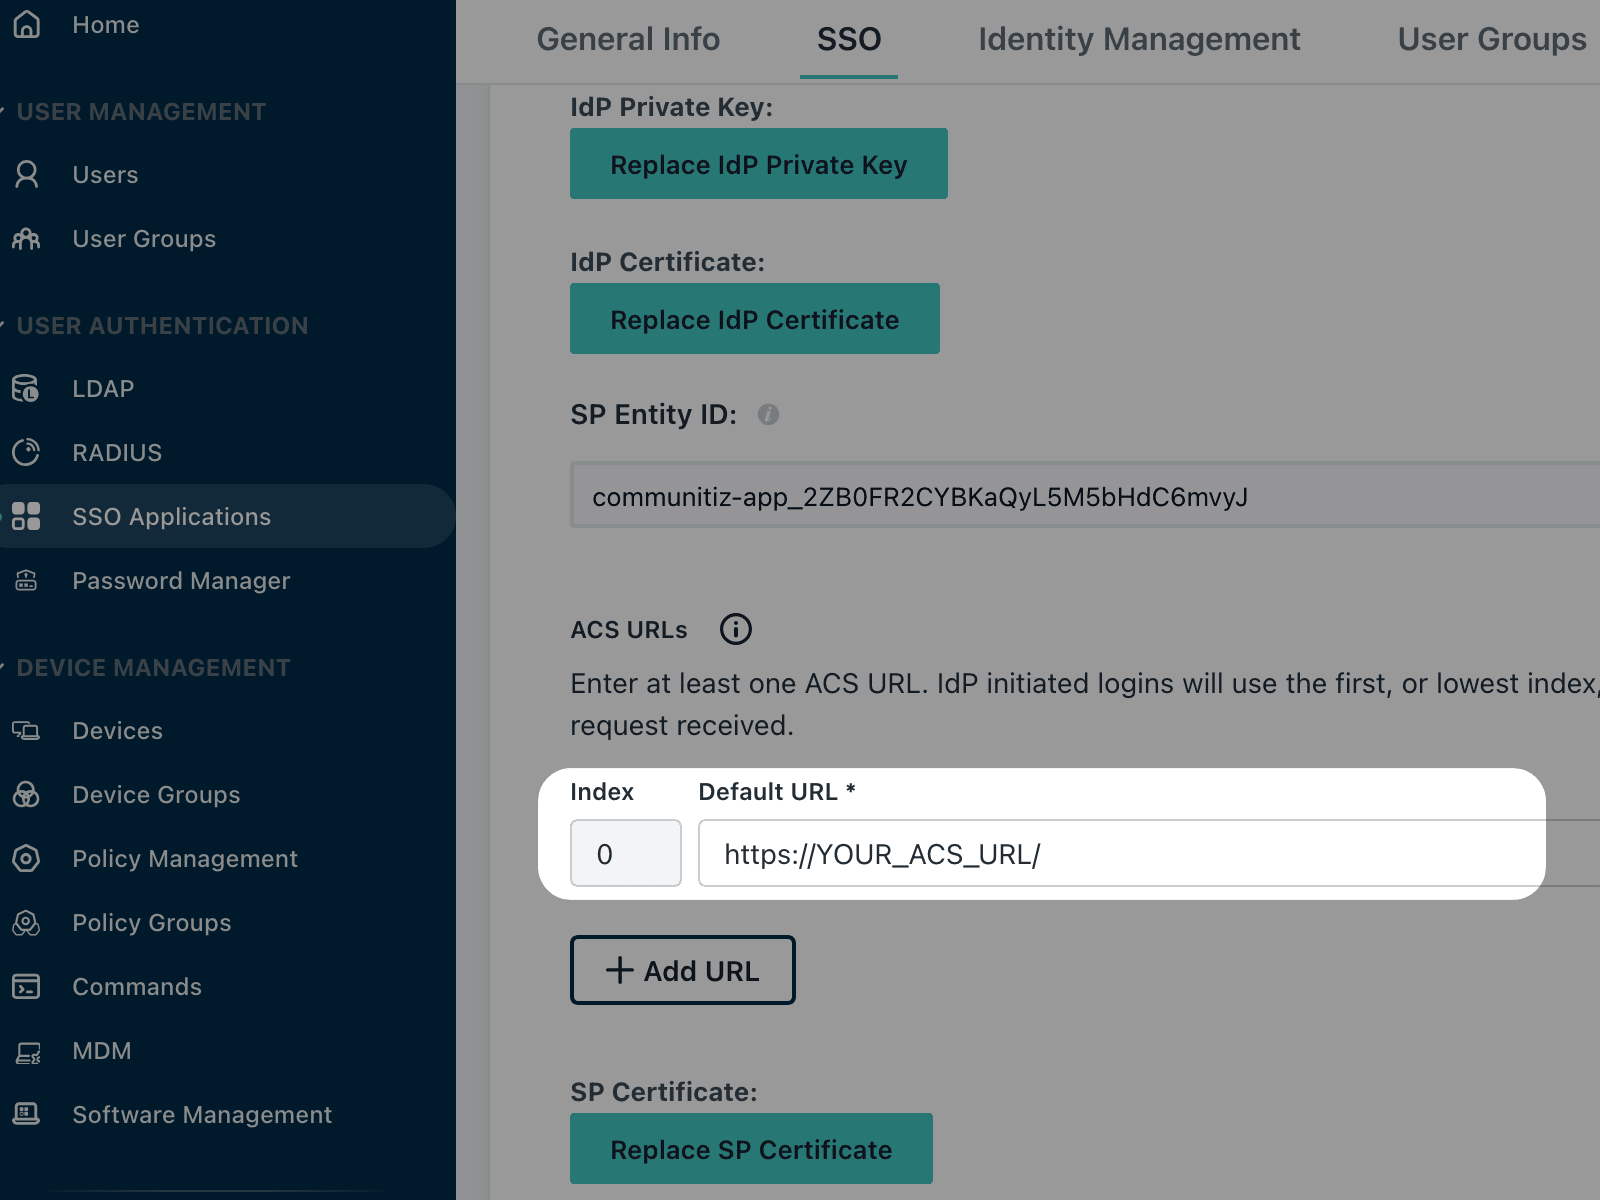
- Now we need to define the ACS URL. Copy and paste the one on the right side of this tutorial 👉
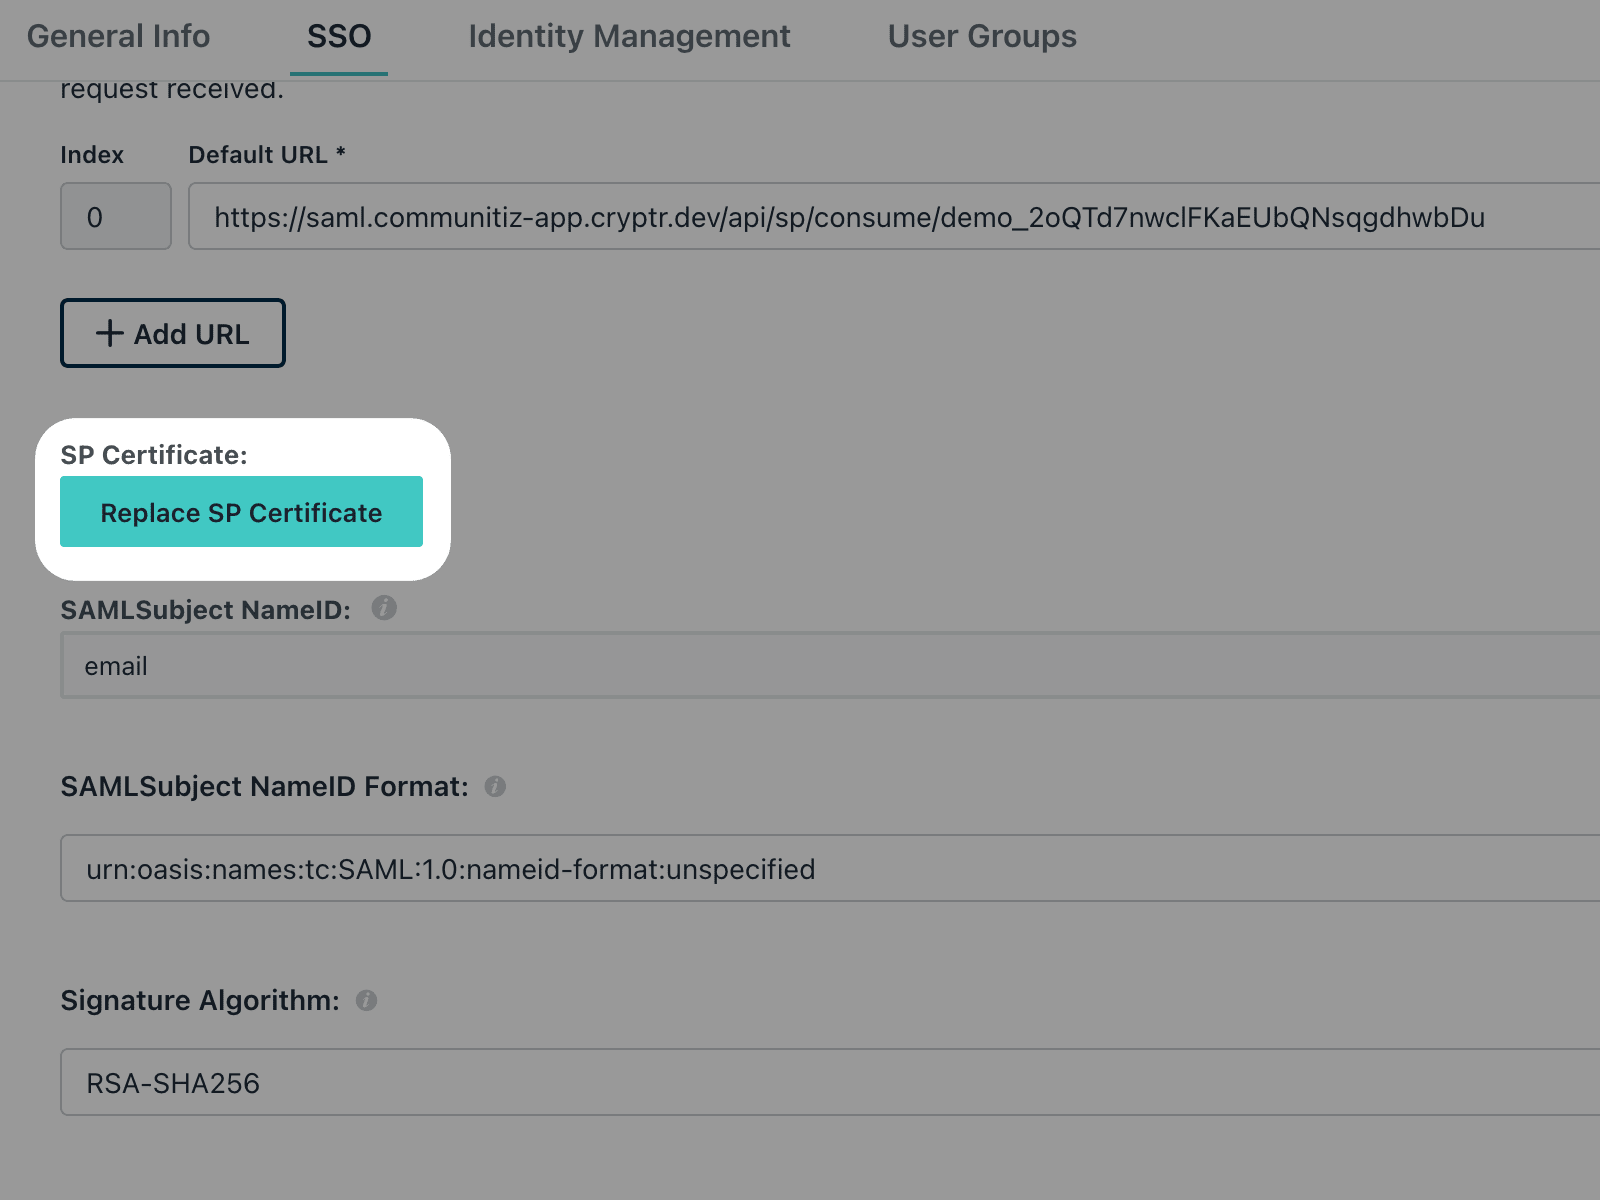
- The next step is to replace the SP certificate.
- First, download the one on the right by clicking “Download” 👉
- Then, on Jumpcloud, click “Replace SP Certificate” and select the one you just downloaded.
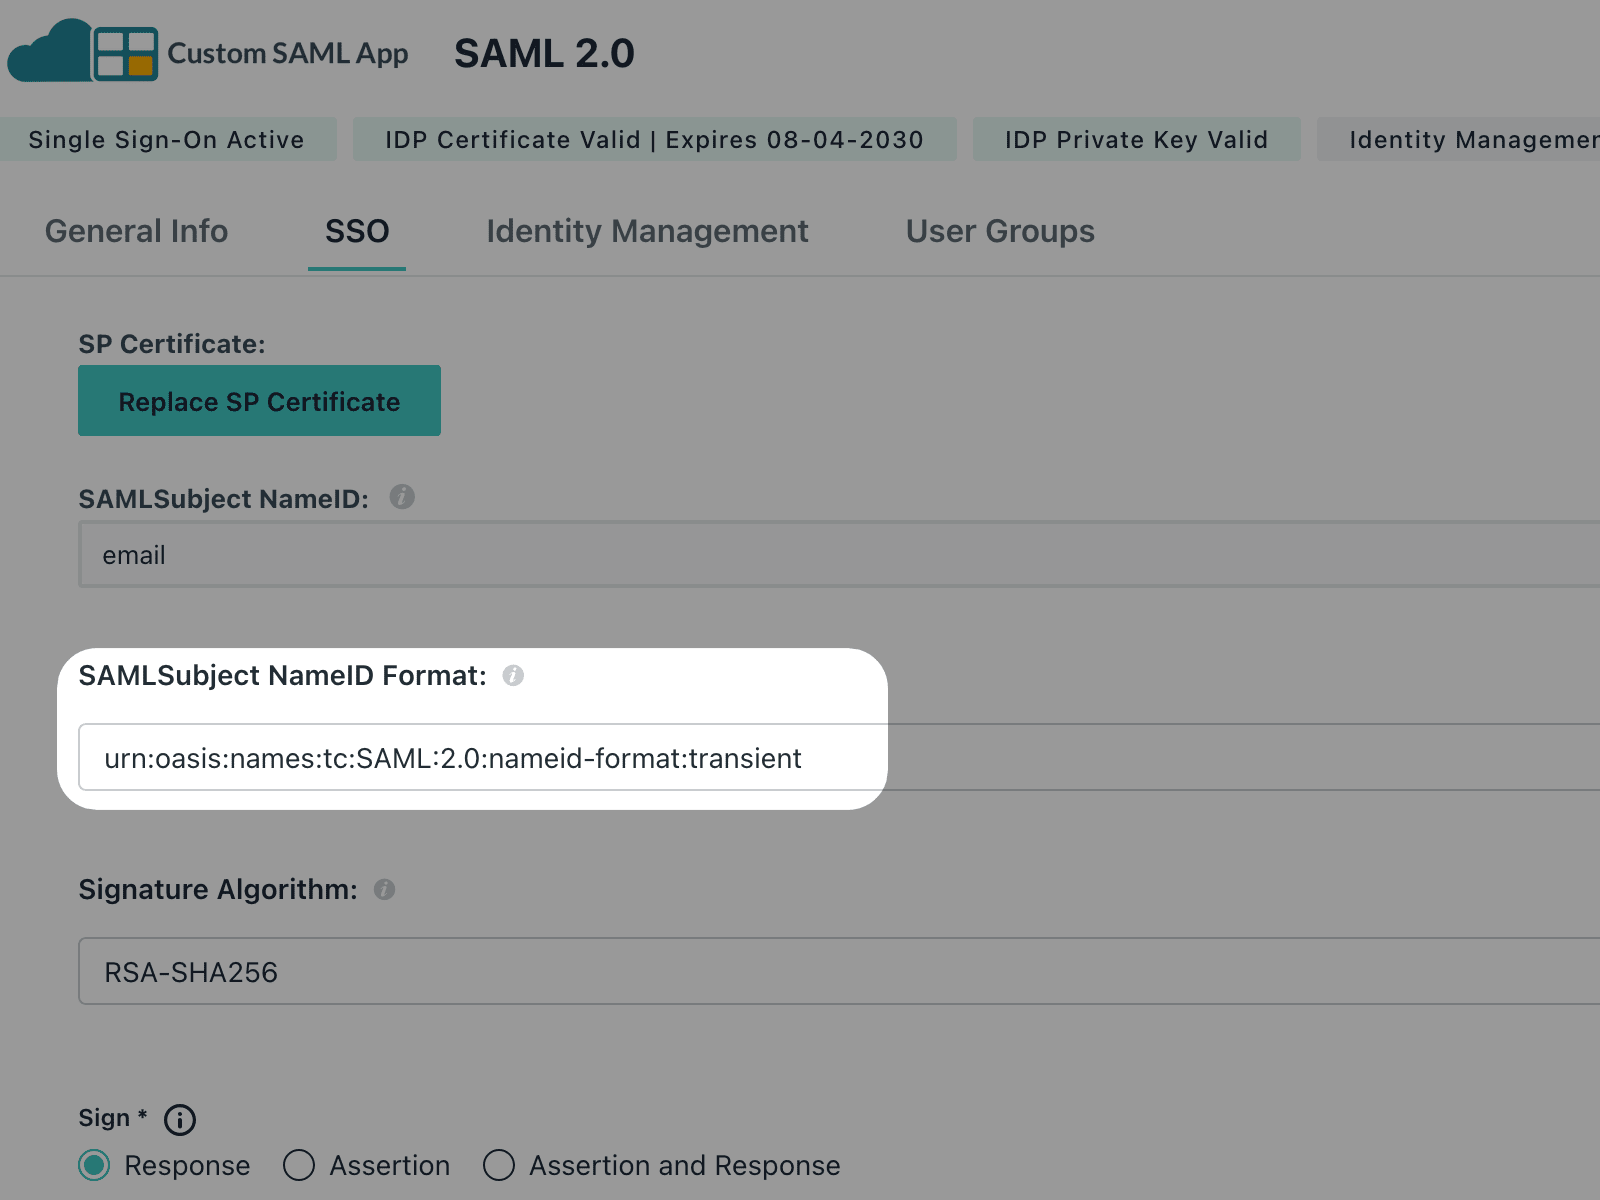
- Now that this is done, we can modify the NameID format. Scroll down a little.
- Check that the SAMLSubject NameID is set to “email”.
- Change the value of SAMLSubject NameID Format to “transient”.
- Scroll down a little.
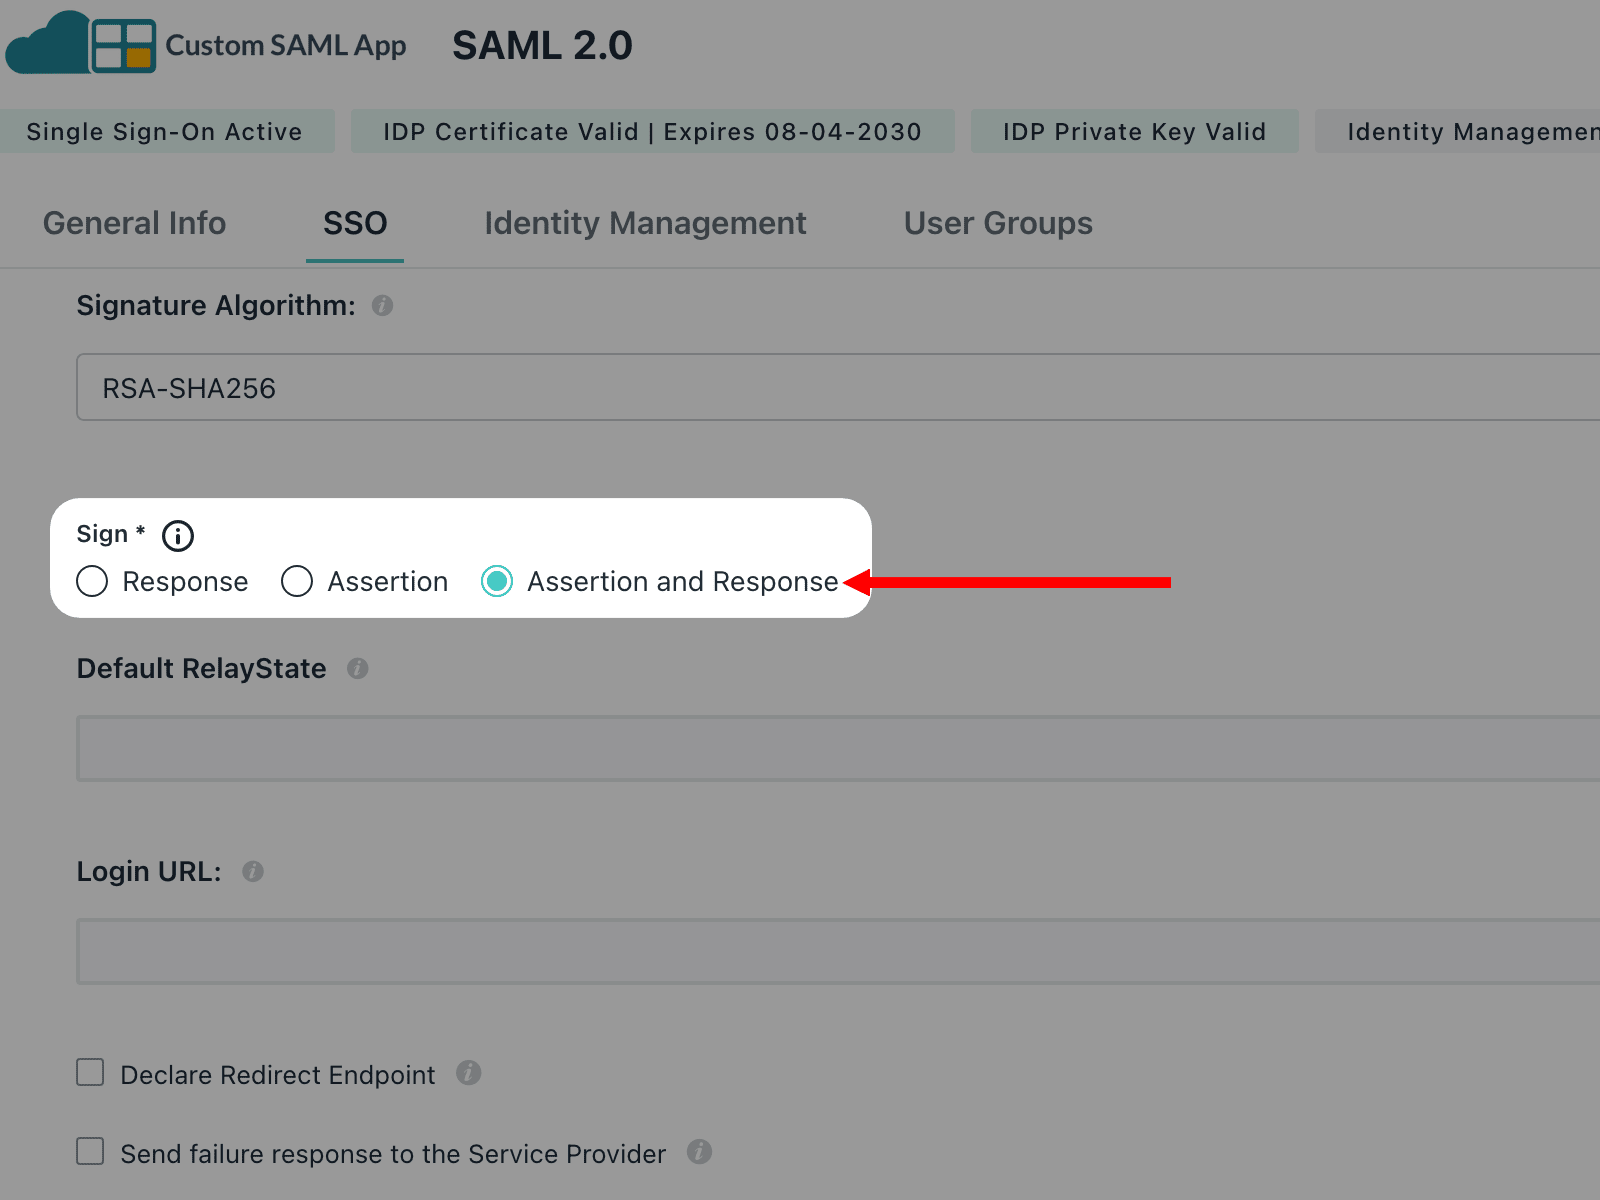
- In the “Sign” section, check “Assertion & Response.”
Attributes Mapping
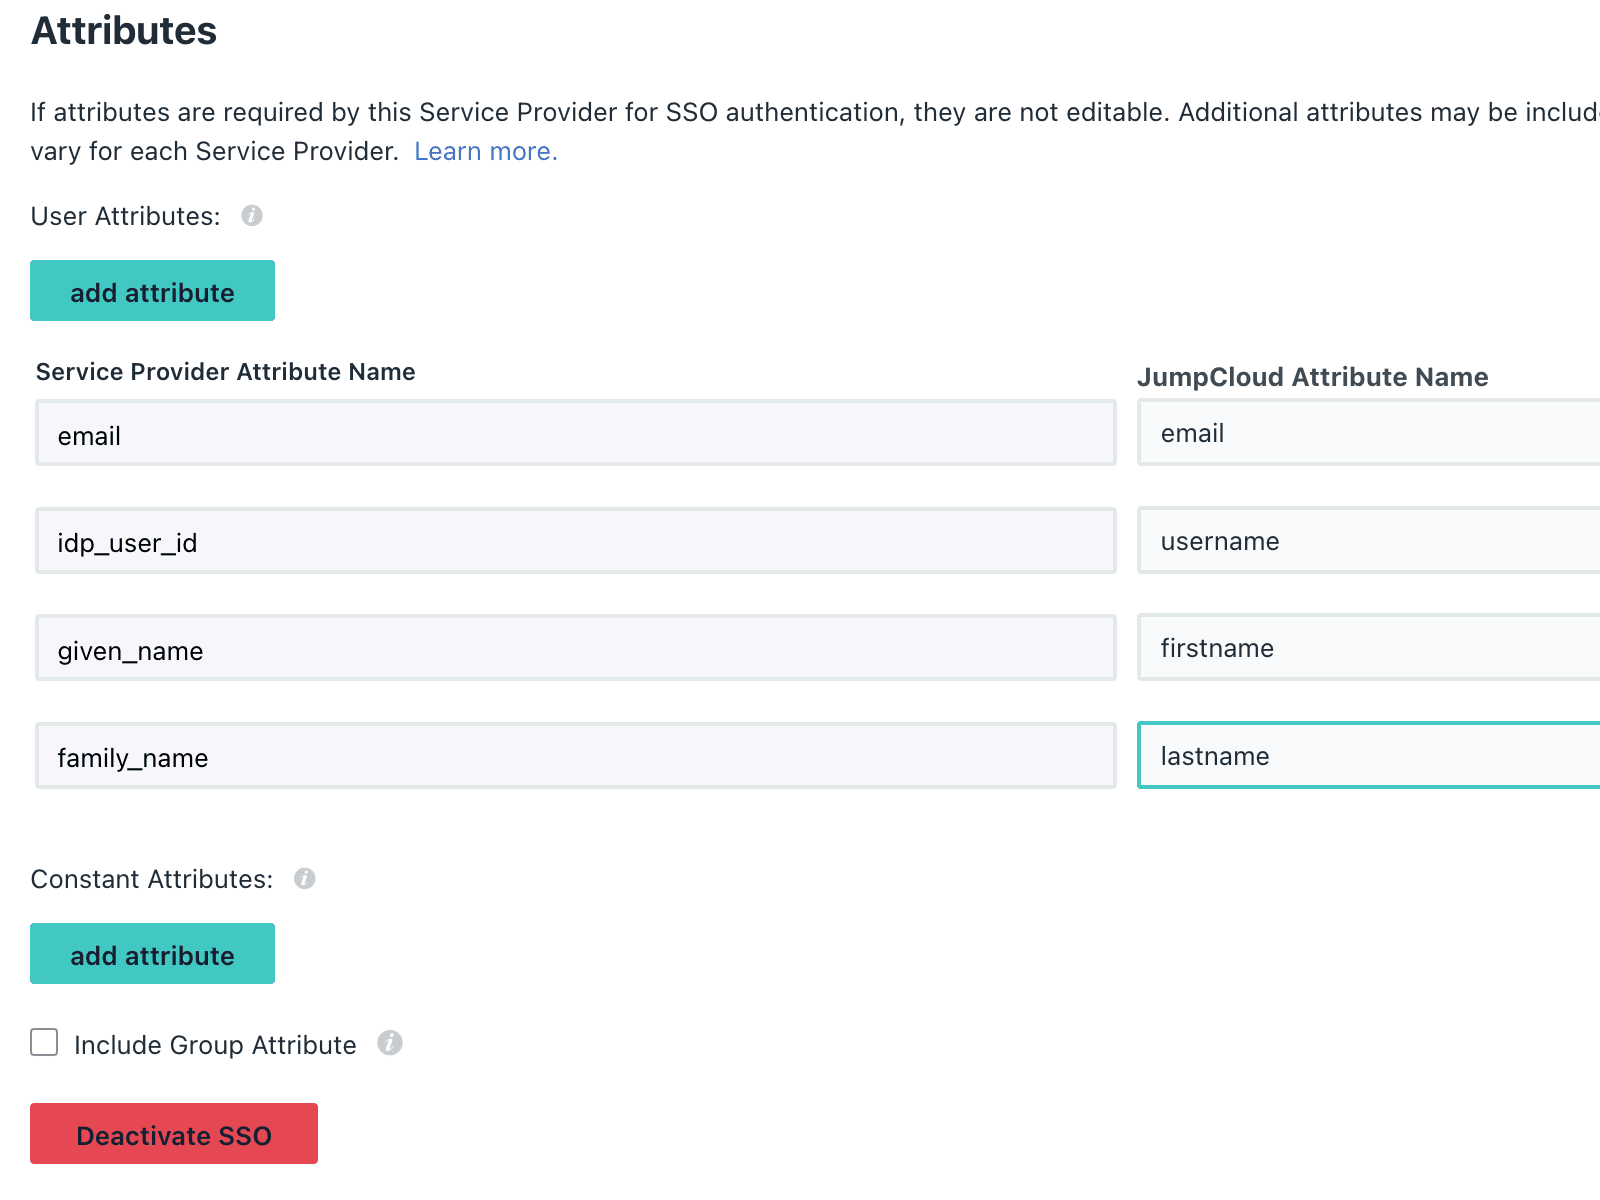
In the "Attribute Statement" section, please fill out the fields as shown above.

- You can now save your configuration by clicking "Save" at the bottom right.
Metadata
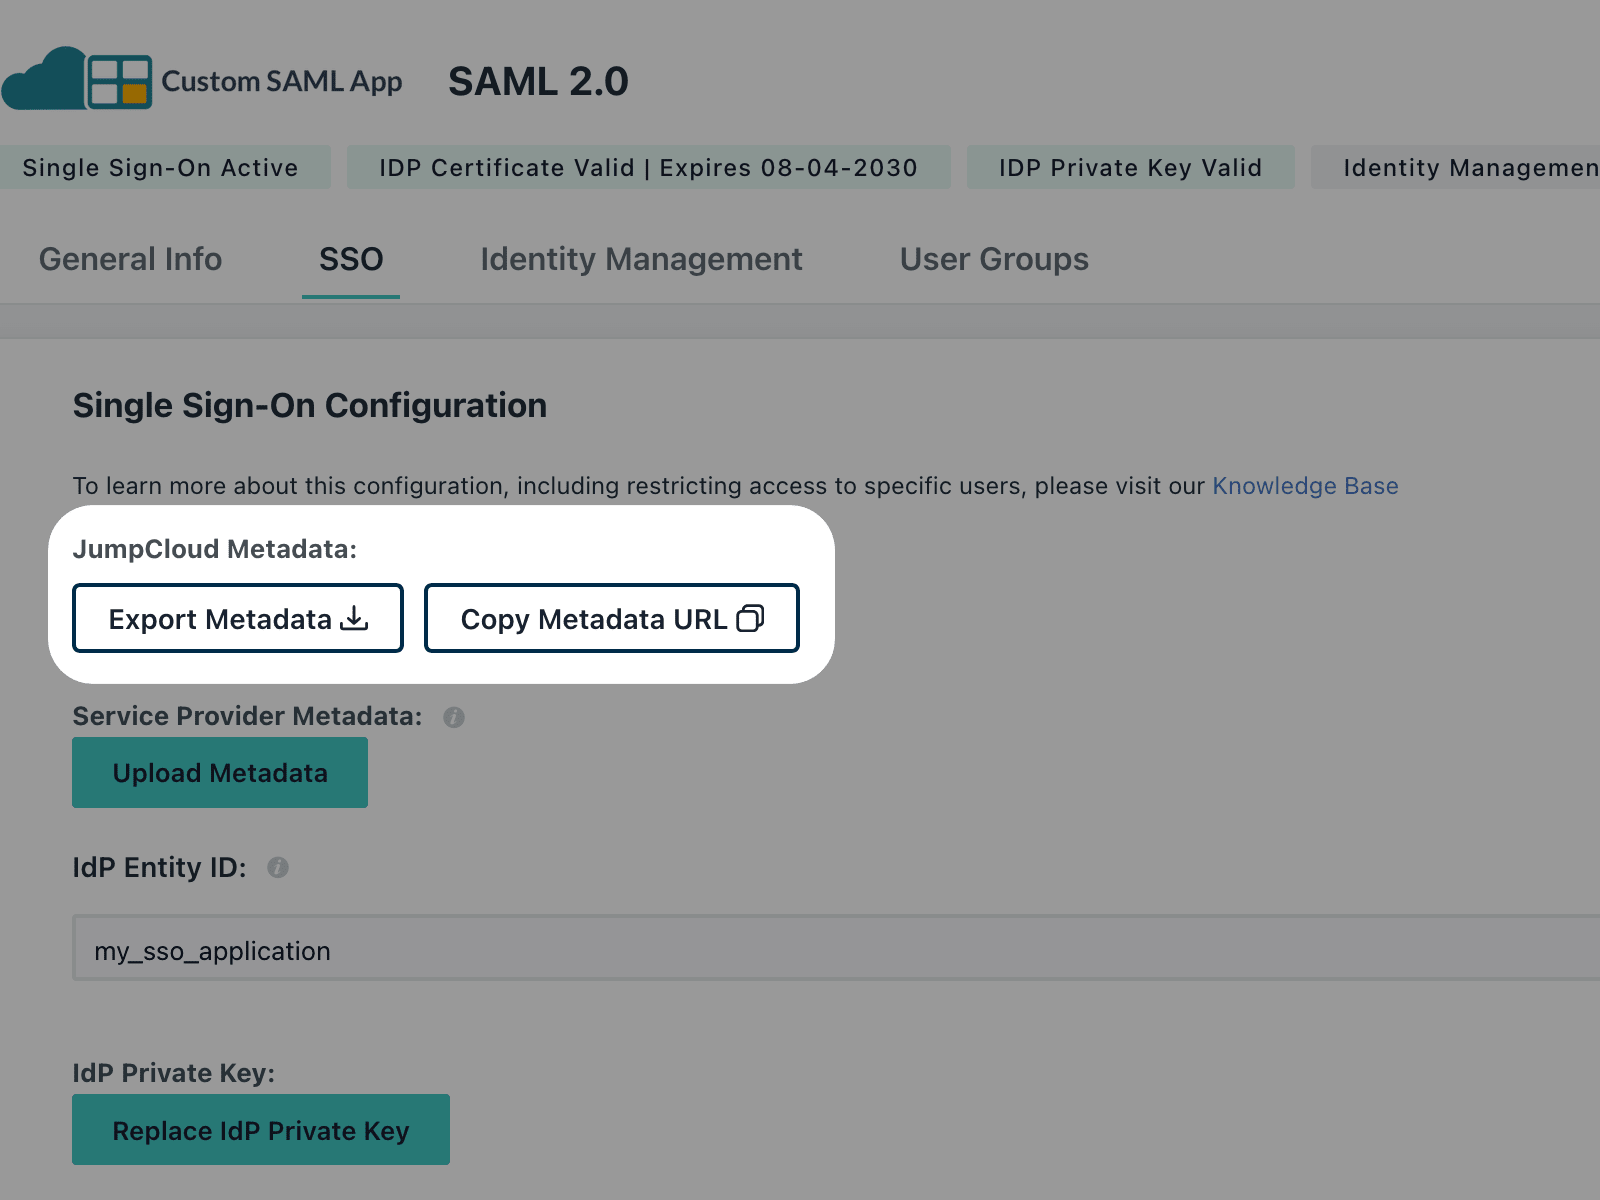
- Once saved, go back to the top of your Jumpcloud configuration.
- Click on “Copy Metadata URL.”
- Paste your URL into the next window.
Paste your XML metadata URL, then hit "Submit".
Users and groups
- Your SAML application is ready. All you have to do now is add Users and Groups to your application.
- To do this, go to the “User Groups” tab in your SAML application.
Test SSO login
Test SSO login